Sewer Inspection Saves The Pocket

Necessity of Sewer Line Inspection and Its Procedures

As homeowners, we’re all familiar with routine inspections and maintenance on various systems within the household. Routine maintenance for a plumbing system is especially crucial. And one residential system, the sewage line, must definitely be carefully inspected and maintained by a professional. You may know that the sewer line can be the costliest of home repair jobs. Well, that’s partially true. And you cannot rely on municipal services – the city won’t cover the expense. Sewer line inspection could save both your home and wallet.

Sewer Line Risks

The most significant risk to your sewer line is tree roots. Over time, trees and shrubbery may grow around sewer pipes or through the pipe walls, causing damage, rust, breakage or significant leaks. In doing this, the roots cause serious debris backup, sending sewage into your home or bursting the pipe outright.

These scenarios are problematic. The moment you notice the telltale signs of a tree root intrusion or sewer line backup, you’ll want to schedule a sewer line inspection. Using innovative technology, a professional plumber can locate the blockage or leak – and begin planning a solution.

Camera Inspections

The latest advancement in sewer line inspection comes in the form of camera inspections. A sewer line camera inspection is non-destructive. A camera inspection will gauge the overall health and strength of your pipes – without risking any further damage. Once a plumber locates the problem area, a proper plan for effective repairs may be formulated.


What a Sewer Camera Inspection Can Do

While a sewer camera cannot find leaks, there are certain situations where the camera alone is effective.

Locate Lines

Sewer cameras have location devices that send out a signal. Using a special signal receiver above ground, our plumbers pinpoint where the camera is underground.

Drainage or Stoppage Issues

We call this your “sewer is not working as it is designed to work.” Sewer pipes work using the power of gravity. The pipes flow downhill so when something goes into the pipe—waste, debris, water—it flows or drains down through your piping system and ultimately ends up at your city’s waste treatment center or septic tank, depending on your particular situation. However, if something is causing your system to not work properly, in most cases we can use a sewer camera to determine what is causing it. Often in cases like these we find stoppages, blockages, roots, mud, broken pipe, etc.

PVC or Cast Iron Pipe

We determine what type of system you have by running a sewer camera inside the pipes.


Video Inspections Are The Best Guarantee!

A plumbing professional can provide a video inspection of your drains,

in addition to clearing any blockages. Should your drain unfortunately

be in need of additional repair, other options include

hydro jetting, relining or replacing the sewer.

Hydro jetting involves using high-pressure spray (up to 4,000 PSI) to remove

debris and other obstructions that may be causing the line to slow.

If relining the sewer is required, one advantage to this option is that

it doesn’t involve digging. The resin-soaked liner attaches to the

inside of the sewer as it hardens; resulting in a solid piece that won’t

shift or crack over time.

Although older style sewer pipes were cast iron or clay, modern sewer replacements

and repairs are PVC. Once the pipe is installed, the trench is re-filled,

and the lawn is seeded and covered with straw. Most of the time the end

result is better than the yard was in the beginning.

An Inspection Identifies Problems Before It Becomes An Expensive Fix

Dealing with sewers is something no one likes to think about until they

have a problem that can’t be ignored: a clogged bathroom or kitchen

drain, a child’s toy that is flushed down the toilet, or tree roots.

Having a plumber service perform a video inspection today will identify

any potential problems before they become emergencies and provide homeowners

with peace of mind.


The Various Methods Used in Pipe Inspection

When was the last time you physically examined your drain or sewer pipes? Probably not any time recently, right? Most people don’t make a habit of digging up their sewer system to make sure that it’s in good condition. That’s why pipe inspection is used. Pipe inspection is a vital part of keeping your drain and sewer system in good condition, because it allows you to identify problems with your pipes. Without it, your only feasible option for repairing issues would be to wait for them to manifest obvious symptoms before taking action. That would give the problems much more time to develop, which would mean more repair costs.

There are a wide range of different pipe inspection methods used across the country today, each of which is useful in a different set of circumstances. Which method is used is up to the plumber handling your system, of course, but it’s still a good idea to know a bit about how they work.

Pushcam Inspections

A pushcam inspection is the simplest, and most popular method for conducting a pipe inspection. The system consists of a camera attached to a long cord. The camera is pushed through the pipe that requires inspection, sending a live video feed back down the cord to the plumber operating it. This is a quick and easy way to get a good look at what’s going on in the pipe, though it’s not the best for every situation. Pushcams have no real way to maneuver in the pipe, so if there is a branch line that needs examination this method would not work.

Lateral Launch Cameras

A lateral launch camera is used when a problem is suspected in a branch line, or when the system needs to be more thoroughly inspected than by just viewing the mainline. A lateral launch camera is pushed through the main line, just like a pushcam, until it reaches the branch that needs inspecting. The system can then launch a second camera into the branch line in order to continue the inspection. This is a popular method for getting a clearer picture of the overall health of the pipe.

Solo Robot Cameras

The most recent method for conducting pipe inspections is solo robots. These machines are not physically manipulated by the operator during the inspection procedure. Instead, they are programmed with the desired parameters for the pipe they’re going to be used in, and then deployed to act out their orders on their own. Solo robots continually send video and other information back to the plumber, but the plumber doesn’t need to actively give it instructions for the duration of the inspection. Once the pipe inspection is complete, the robot wheels itself to the nearest location where it can be retrieved.


During the Sewer Camera Inspection

Upon arrival, the technician will have to look around to locate plumbing lines and access points so we ask that any pets on the property be restrained.

If any of the interested parties are present, they are welcome to view the video while in process. While making the sewer lateral inspection video, the technician will discuss what they are seeing in the line and if it is open and in serviceable condition.

There are times when the technician may not be able to see the entire sewer lateral due to a blockage or damage. Therefore, the sewer camera inspection will need to be rescheduled after the proper corrections, such as cabling or access to the stack, have been made.

Tape and flags may be placed on the ground surface to mark the location of damage or blockage found in the line. Please do not move these markers.

Top Stainless Steel Kitchen Sink Brands To Watch For This Summer Season

How to Choose the Right Kitchen Sink

Few features in the home are used as often as the kitchen sink. And what other home item performs as many different tasks? It could be argued that the selection of a sink is one of the most important kitchen choices you will make — and it’s a decision that will affect your daily life for many years to come. We spoke to designers who belong to the National Kitchen and Bath Association (NKBA) about how to select the right sink for your kitchen.

Pros: A kitchen sink with a single, deep basin means you can easily soak or wash a big pan or prep large quantities of food.

Cons: Rinsing vegetables while soaking a large casserole dish requires a bit of juggling — as does hand washing and rinsing china or stemware.

Pros: Two basins in your kitchen sink allow you to perform separate tasks, such as cleaning dishes and preparing food, with ease. A 60/40 kitchen sink has one basin that is usually about 18 inches wide and another that is 14 inches wide. The idea is that you can clean up in the large basin and prep in the smaller one. Dual basins also come in handy when you are washing items you don’t want to put in the dishwasher (soap in one basin, rinse water in the other).

Cons: A smaller basin makes it harder to wash and soak large pans. “For clients who want flexibility, a double sink can be the way to go,” says Flatley. “There are also a number of people who are accustomed to working with two basins, and they don’t want to change.”


Tips for choosing a new kitchen sink

Here at Buster, such is our interest in the humble sink that we keep our eye on the latest trends and designs, especially those for the most used sink in the house. Here’s some important considerations when thinking about buying a new kitchen sink.

One sink

One large sink will be preferable if you are considering a farmhouse sink, as that is the style. The advantage of a large sink is that you have a lot of space to wash up and to leave that large casserole dish to soak. The downside is if you are juggling two sink-based chores at the same time  – maybe washing up and preparing food – it can be quite tricky in one sink.

Two sinks

When it comes to choosing a double-basin sink, there are several popular styles to choose from. If you have one larger sink and one small sink – the 60:40 ratio is a common standard – you should have one sink big enough to soak most pots and pans and still space to prep food. This might not be the case with two basins of equal size side-by-side.

Three sinks

There are also three-sink options, typically with two basins and a smaller sink with a garbage disposal unit. A trough sink is another type of sink that has become popular in recent times, so several people can work at it at one time. Remember, these will take up more space.

Which material works best for your needs?

Sinks are made from a range of different types of materials these days. The type you go for will depend on the overall style and look you are after – while there are also practical considerations i.e. how hard wearing and easy to clean the material is.


Choosing the Right Kitchen Sink and Faucet

Every kitchen needs a sink and faucet. When it comes to selecting these staples, style is secondary, says Max Isley, owner of Hampton Kitchens in Raleigh, N.C., and a National Kitchen and Bath Association board member.

One of the most hard-working features in a kitchen, your sink should be both functional and reflective of your kitchen’s style. Learn about various materials and styles available in kitchen sinks.

Sink Options

Kitchen sinks are typically made from stainless steel, enamel-coated cast iron, solid surfaces and composites. For clients who choose solid surface counters like granite or engineered stone, Isley recommends a stainless steel sink because of its undermount capability. Also if homeowners tend to be hard on sinks (Isley asks clients if they’re prone to throwing things into their sink), stainless is often the best choice. When shopping for a sink, keep in mind that lower-gauge stainless steel makes for a better quality sink. Some people find stainless steel sinks noisy, but that’s a problem that can be addressed by choosing a design featuring sound-absorption technology.

Once the standard in kitchen sinks, enamel-coated cast iron still has a place in today’s kitchen. “They’re probably the prettiest of all the sinks on the market today,” Isley says. However, he cautions that enamel can scratch and wear over time, which may not make this sink the best choice for people who are tough on sinks.

Faucets that Function

With the great number of faucets on the market, there is a design for everyone. “Style is strictly a personal taste issue,” Isley says. He doesn’t dictate what clients choose design-wise — people like what they like, after all — but he does guide them when it comes to function and finishes. Most faucets use cartridge, ball or ceramic disc valves. A faucet with a ceramic disk valve and solid brass base materials will be the most durable. Though many attractive faucets have two handles, Isley always pushes for single-lever faucets in the kitchen. He also suggests clients include a spray arm for filling pots with water or rinsing the sink, whether it’s part of the spout or a separate piece. Consider other convenient extras, like a garbage disposal and hot water dispenser.


Things You Should Consider Before Buying a Kitchen Sink

Choosing a brand-new kitchen sink is an investment that will completely change the look and functionality of your kitchen. To make sure you get the kitchen of your wildest Pinterest dreams, there are some factors you should consider before taking the plunge. From the right material, to the ideal size, to the big choice between an undermount or a drop-in sink, here’s everything you need to think about before buying a kitchen sink.

Consider the material.

When it comes to kitchen sinks, there are many materials to choose from: porcelain, stainless steel, cast iron, just to name a few. Be realistic about how much use the sink will get and how frequently (and thoroughly) you plan to clean it. Porcelain sinks are prone to stains and scuff marks, but don’t worry, they do come off! It just takes a little elbow grease and a cleaner that’s mildly abrasive, like baking soda.

Choose a drop-in or undermount.

What’s the difference? As the name suggests, a drop-in sink drops into the counter, so there is a visible lip that rests on the counter. Alternatively, an undermount sink attaches beneath the counter, creating a seamless look. An undermount sink, like the beautiful Elkay Lustertone Iconix Stainless Steel Sink, maximizes the available counter space, since the lip of the sink rests under the counter rather than on top. If you love a clean kitchen, this sink is for you: because there’s no lip, dirt and grime can’t get stuck between the sink and the edge of the countertop. Plus, because undermount sinks are considered a high-end option, this stylish kitchen sink could even boost your home’s resale value.

Select the right size.

There are a few questions you have to ask yourself when choosing a sink size. You want to keep budget in mind—generally, the larger the sink, the higher the price. You also need to be realistic about how much you use your sink. If you’re not an avid cook, you can probably get away with a standard size (about 22 to 33 inches long) but it’s always better to go bigger than smaller if you have the countertop space to accommodate it. Pay attention to the scale of the design as well. If you have a really tiny kitchen, a huge farmhouse-style sink risks overwhelming the entire room.

Determine if you’ll need to adjust your cabinets.

Think of your cabinets as the foundation for your sink. Depending on what you’re working with already, you have to choose your style carefully, unless you’re doing a complete renovation. The biggest considerations: make sure the cabinets you have can accommodate the depth of your new sink and that they can support the weight of the new sink. For example, a porcelain farmhouse sink that’s filled with water can easily weigh over 100 pounds—the cabinetry has to be able to withstand that.


How to Choose a Kitchen Sink

Your kitchen sink is probably not the place where you’d choose to spend your time, but it’s a necessity—and having the right one can make all those minutes spent scrubbing and rinsing easier and more efficient. Learn about the different materials, types of sinks, and factors to consider as you discover how to select a kitchen sink that fits your needs.

Types of Kitchen Sinks: Materials

Kitchen sinks come in many different materials, including metal and stone. The best kitchen sink material for you depends on how much money you want to spend, your cleaning routine preferences, and what material goes best with your kitchen’s style.

Stainless-steel kitchen sinks are one of the most popular options and the material continues to be improved and upgraded. The newer 16- and 18-gauge sinks are thicker and less noisy than their less-expensive predecessors. Stainless-steel sinks contain a percentage of chromium and nickel, which is indicated by numbers such as 18/10 (18 percent chromium and 10 percent nickel). The metal imparts a rich glow and adds corrosion resistance. Finishes range from a mirrorlike shine to a satin luster. Stainless-steel kitchen sinks are appealing because they are affordable, durable, and easy to clean. However, they can become scratched and water spots can become an issue, and the cheaper sinks can sometimes make more noise when items are dropped in.

Cast-iron kitchen sinks are made from a sturdy material that is enamel fired on an iron form. These durable sinks lessen noise and vibration more than other materials but can be heavy for installation. An added advantage is that cast-iron sinks are available in a wide range of colors.

Composite sinks can be made of quartz, granite, or other materials mixed with an acrylic- or polyester-resin base. They usually feature speckled color, resistance to stains and scratches, and easy care. However, they can be expensive.

The Best Way To Do Clogged Toilet

How to Unclog a Toilet

Clogged toilet? No problem. With a little practice and a plunger or a toilet snake, even a home repair rookie can get most clogged toilets back up and running in minutes, without flooding the bathroom and making the situation worse. In this article we’ll show you how to avert a morning household disaster by clearing a clogged toilet fast.

Toilet not flushing all the way? Test for a clog when your toilet won’t flush

Ever uttered the words my toilet won’t flush? A poor flush means that your toilet drain is either partially or completely plugged. If your toilet won’t flush – a no-drainer – is obvious. The toilet bowl will fill to the brim with flush water and perhaps overflow. Give the water level 10 minutes or so to drop, then attack the problem with a toilet plunger to begin unclogging a toilet.

However, most clogged toilets are slow drainers. That is, flush water partially fills the bowl but doesn’t rush out and clean away the waste. The water level remains high, then usually drains down to normal height within a minute or two. You might not know the toilet is clogged until you flush it. So if you suspect a problem, test the drainage first. If it doesn’t drain, don’t flush it. Reach for the toilet plunger.

How to fix a toilet that won’t flush:

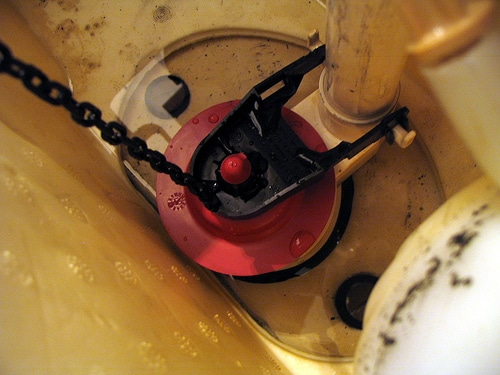
Remove the tank lid and lift the flapper valve slightly to let a cup or two of water into the bowl to see if the water goes down before trying to unclog the toilet. Flushing a clogged toilet may flood your floor!

Lift the Flapper to release a bit of water

Lift the flapper slightly to release a little water. That’s how to make a toilet flush. However, if there is a clog, the water won’t flush.

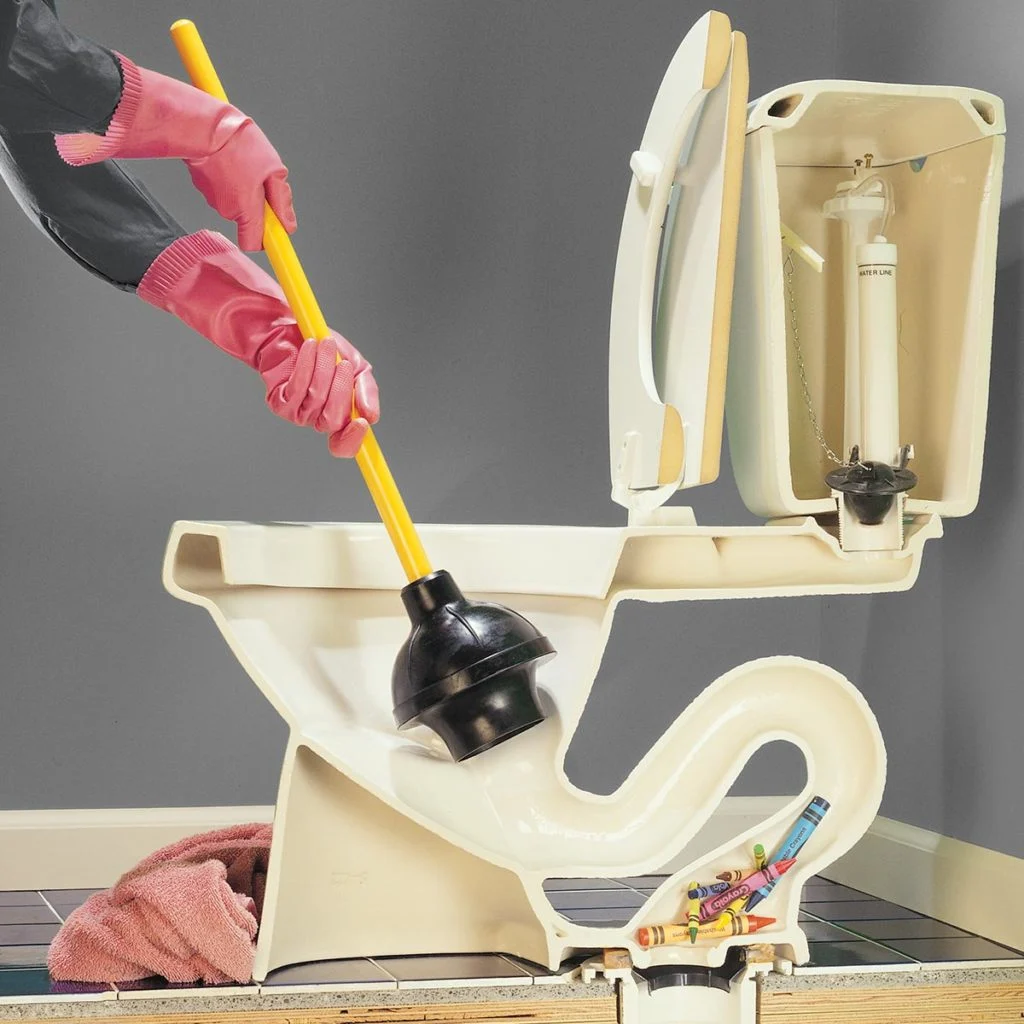
Unclog a Toilet: Begin with a plunger

For about 90 percent of clogged toilets, you only need one special tool—a toilet plunger. Buy a toilet plunger with an extension flange on the rubber bell-shaped end. A toilet plunger with an extension flange is designed to fit toilets better, so you can deliver more “oomph” to the plunge. You could pull a woodchuck from a hole with a toilet plunger with an extension flange. The toilet plunger will unplug sink and tub drains, too, if you simply fold the flange back into the bell.

Here’s how to use a plunger:

The first step in how to unclog a toilet with a plunger is to plunge the toilet with the rubber flange pulled out to get a better seal. Push in and out vigorously, keeping enough water in the bowl to cover the plunger. Keep towels handy to wipe up water that splashes out. If this doesn’t fix the issue, keep reading on how to plunge a toilet.

Plunging Tips: How to Use a Plunger

A toilet plunger fits over and seals the toilet drain. Wear rubber glove—things can get messy—and follow these plunging tips:

  • Make your first plunge a gentle one. Initially the bell is full of air. A hard thrust will force the air back around the seal and blow water all over the bathroom and you!
  • Once you force out the air, plunge vigorously in and out, maintaining the seal. You’ll be forcing water both directions in the drain, which will effectively loosen most clogs. Stick with it, plunging 15 to 20 times if necessary.
  • Be patient. Try alternating between steady strokes and occasional monster heaves.
  • Keep enough water in the bowl so the toilet plunger stays covered. Trying to force air through the toilet trap won’t generate much pressure.

Most of the time, this is all it takes to clear the clog. But for tougher clogs, try using a toilet snake. (Note: If you have repeated clogging, it might be a toilet performance issue.


No Plunger Needed: 7 Easier Ways to Clear a Clog

It’s never an ideal situation: A quick trip to the bathroom followed by a single flush and, boom, you’re dealing with a clogged drain or—much worse—a nearly overflowing toilet. If you find yourself without a plunger, or if it fails you, consider your options before hiring a plumber. There are a plethora of alternative ways to take care of business, many of which require nothing more than the items you have in your bathroom or kitchen cabinets. Here are 7 method…

  • Heat Wave

When you notice a nasty clog, your best bet is to fill a pan with hot water. Heat it up on the stove or use the tap, but don’t let the water get to boiling point. Pour it down the drain and let it sit for a few minutes to see if it loosens the clog. You’ll know if your efforts were successful if you see the water start to drain. Then, give the toilet a flush or two. In many cases, the hot water is enough to break up whatever is causing the backup.

  • Dish Duty

If you need to kick things up a notch, borrow some dish soap from the kitchen and squeeze a generous amount, about a 1/4 cup should do, into the toilet bowl. Let the soap sit for 5-10 minutes so it has time to move down the drain and reach the clog. Then, add hot water (again, not boiling) to the bowl and give it some time to sit. In most cases, the soap will act as a lubricant and grease the clog in the toilet drain to get everything moving again.

  • Fizzy Fix

It’s time to channel what you learned in elementary school science! If your toilet bowl is already filled to the brim, either empty out some of the water or be prepared for a little overflow. Next, pour one cup of baking soda and one cup of vinegar down the toilet drain. When the vinegar and baking soda combine, the natural chemical reaction will bubble up and loosen the clog. After about thirty minutes, follow up with some hot water and see if it drains. If it does, you’re good to go. If it doesn’t, repeat the process once more.

  • Brush Battle

This may seem a little unpleasant, but if you’re really in a bind and there’s no plunger in sight, grab a toilet brush and angle the bristles down the drain. Pumping up and down a few times should be enough to loosen things up so the clog clears in no time.

  • Helping Hanger

If you don’t have access to a plumbing snake, you can fashion your own using a wire coat hanger from your closet. Simply unwind the hanger so that it’s completely straight with the exception of the hook. Then, wrap a small rag around the hook to help prevent any scratches or damage to the porcelain and, while wearing rubber gloves, gently angle the hanger down the drain until you find the clog. When the water starts to drain, flush the toilet a few times to clear it out.

  • Bathroom Bomb

Don’t run out to buy Draino, create your own DIY de-clogger instead by mixing together the following ingredients: 2 cups baking soda, 1/4 cup Epsom salt, and 8-10 tablespoons of dish detergent (add one tablespoon at a time). Pour the combination into individual muffin liners, then let them dry and harden overnight. The next morning, drop one into the toilet bowl, add four cups of water, and let it sit for a few hours to see results.

  • Vacuum Valve

Last resort: Rent a wet/dry vacuum from your local hardware store—do not, we repeat, do not try this with a regular vacuum. First, use it to empty the water from the bowl. Next, wrap the hose in an old rag to create a seal, then stick the vacuum a few inches down the drain. When you turn on the vacuum, it should suck out the clog. Again, don’t forget the rubber gloves!


The One Surefire Way To Unclog a Toilet

These tips will get the water flowing.

Clogged the toilet? Don’t panic. A toilet clogged with human waste is disgusting and can be embarrassing, but it’s easy to fix. I’ve unclogged countless stoppages for my family and friends, and during volunteer work. What I write here isn’t theory. It works

Step 1

The lower portion of the toilet is called the stool. If the stool is filled with water and getting close to overflowing the rim, shut off the stop valve that supplies water to the toilet. The valve typically is located to your left as you stand and look at the toilet. In rare cases, when the toilet isn’t close to a corner, it may be on the right.

Step 2

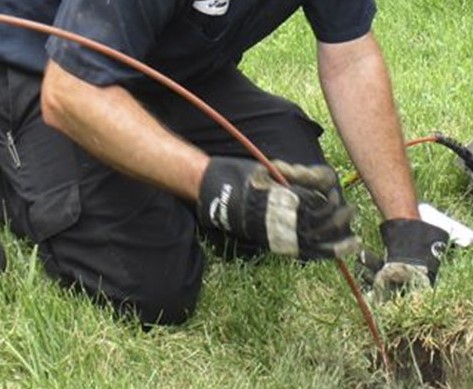
Make a Toilet-Clearing Tool From a Wire Hanger

Take a coat hanger and a pair of linesman pliers (or anything that can cut wire). Cut the hook off the coat hanger. Bend the hanger into a straight rod and use the pliers to bend a small one-inch-long hook into the wire’s end. Hook into the waste and break it up. Yes, this process is gross and may make you gag, but do you want to clear the clog or not?

Don’t get too aggressive here or you’ll scuff up the stool and spend the next couple of hours polishing out the scratches with powdered cleanser.

Step 3

Hooking into the waste and breaking it up will create a water passage that will lower the water in the stool. Next, take a cup plunger such as this and place it over the drain hole in the bottom of the stool. Gently rotate the plunger’s handle like you were stirring a pot, while keeping the plunger’s cup firmly over the drain. This rotation seats the plunger’s cup and permits a powerful plunging action.

Step 4

Pump the plunger handle straight down, aiming directly into the drain opening. You should feel and even hear the suction. If not, you didn’t seat the cup over the drain hole. No problem—just repeat Step 3 and plunge again.

Step 5

The toilet will drain (I’ve never seen one not drain and I’ve cleared some whoppers). Flush the toilet somewhere between two and four times to move the waste out of the house’s drain and into the sewer or septic tank.

If Poo Wasn’t Your Problem

In rare instances, a toilet will swallow an oddly shaped solid like a toy or a piece of clothing. In these cases, you can unclog the toilet only to have the obstruction lodge downstream, especially if there’s hair or preexisting clogged material. When that happens, your best bet is to call a plumber and have him power auger the home’s drains. They probably needed it anyway.


How to Unclog a Toilet Like a Plumber

It’s every man’s worst fear. You’re at someone’s house, you  finish doing your business and flush the toilet, but instead of going down, the water comes up along with whatever you just deposited in the bowl. Would you be paralyzed with panic in that moment? Or do you know what to do?

Thankfully, unclogging a toilet isn’t hard at all. Even the most gnarliest of clogs can be taken care of with ease.

  1. Stop the Toilet Bowl From Filling Up.

If it looks like the water might overflow out of the toilet, Rod suggests taking the lid off the tank as quickly as possible and closing the toilet flapper. The flapper releases water from the tank and into the bowl. It looks like, well, a flapper. If you’re worried that your flush has a good chance of turning into a flood, take off the top before you pull the trigger. Then you can keep one hand close to the flapper while the other hands pushes the flusher. The minute it appears the water is rising, you’re ready to stop the deluge

  1. Get the Right Plunger

Once disaster has been averted, it’s time to unsheathe your plunger. To effectively use a plunger, you need a good seal between it and the toilet bowl. Funnel-cup plungers are the best plungers for this. They’re the ones with a flange, or added piece, extending off the bottom of the rubber cup.

  1. Warm Up Your Plunger

Stiff, hard plungers don’t work as well as soft and pliant ones. Run your plunger under some hot water before you use it. This will soften up the rubber, which will help you get a better seal on the toilet bowl.

  1. Plunge Correctly

Stick the plunger in the bowl and use it to form a solid seal over the exit hole. Rod said that most people only focus on the downward push when plunging. But the pullback is just as important. Give a few good up and down strokes with the plunger and flush the toilet. If the water clears from the toilet, then you’ve successfully unclogged it. If the toilet starts overflowing again, just close the flapper to stop water from entering the bowl. Repeat the plunge and flush sequence until your clog is gone.

  1. Secret Plumber Trick: Add Hot Water and Dishwasher Detergent.

Add a few cups of hot water to the toilet bowl before you start plunging. After you pour the hot water in, let it sit for a few minutes. To put it mildly, the heat helps break the, um, stuff up. This will make unclogging the toilet with the plunger much, much easier. The heat from the hot water can sometimes break up the clog without plunging, so this could be a good tactic to use if you a clog a toilet at a friends house and you don’t want to face the embarrassment of asking for a plunger. Also, try adding some dishwasher detergent to the mix. The soap can help break the clog up, as well.

  1. Another Secret Plumber Trick: Use Baking Soda and Vinegar

Another trick to unclog toilets comes from your elementary science fair project. Pour one cup of baking soda into the clogged toilet and then slowly pour one cup of vinegar into the bowl. The chemical reaction and fiz can help break down the clog.


For Harder Clogs, Use an Auger

If the plunger doesn’t work, Rod says it’s time to bust out a toilet auger. An auger is a cable-like device that you snake through the toilet hole to help loosen up a clog. You can find augers at most hardware stores.

To use an auger, you simply snake the cable down the hole. Start turning the crank on the end you’re holding until it stops. This means you’ve reached your clog. The auger will either break up the clog or hook on to it. If it feels like you’ve hooked the clog, pull it out. Discard any waste on the end of the auger. Give the toilet a few good plunges to clear up any left over blockage. Flush. Shazam! Cleared toilet. You might want to put some gloves on for this job in case you need to clean off some… matter from the plumbing snake.


4 Signs Your Main Sewer Line Is Clogged

The sooner you recognize the warning signs of a main sewer line blockage, the better. A clog in the main sewer line that goes ignored or unnoticed can lead to costly repairs but can also expose your family to contaminated water.

To help keep your family and home safe, we’ve covered 4 warning signs that your home’s main sewer line is clogged.

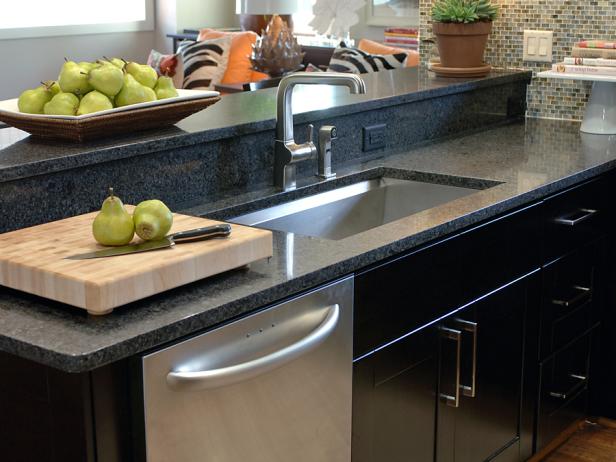
Sign #1: Multiple backed-up drains

Check the following water fixtures:

  • Toilets
  • Sinks
  • Bathtubs
  • Showers

If more than one drain is slow moving, gurgling, smells bad or has water backing up, you most likely have a main sewer clog

You see, your home’s drain lines carry wastewater away from your home and are designed like a tree—the “trunk” is the main sewer line while the “branches” are smaller, secondary drain lines that connect to each water fixture (all secondary lines feed into your main sewer line).

And because every water fixture’s drain eventually connects to the main sewer line, a blockage in that main line will affect various drains in your home.

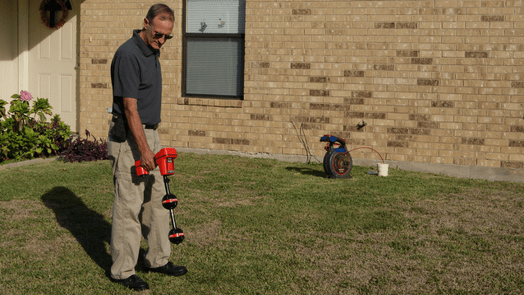
Sign #2: Drainage in sewer clean out

If you see sewage standing in (or draining out of) your home’s sewer cleanout, you have a main sewer clog.

So what exactly is a “sewer cleanout” and how can you find yours?

Well, a “sewer cleanout” is a pipe that connects directly to your home’s main sewer line and gives plumbers direct access to clear any blockages. In most Colorado homes, the sewer cleanout is usually located just outside your home or in the basement and is marked by a round or rectangular cap (sometimes titled “sewage” or “cleanout”).

Sign #3: Sewage in floor drain

If your main sewer line is clogged, all the sewage and waste water sitting in the pipes have nowhere to escape. Which means, eventually, the sewage will force its way into a secondary drain.

And when this happens, you’ll soon be able to see (and smell) sewage coming up from floor drains.

Sign #4: Water backs up in shower when toilet flushes

If you notice that water backs up in random places as you’re using water fixtures, you likely have a blockage in the main sewer line

Two common examples of this include:

  • When you flush your toilet, water backs up into the bathtub/shower.
  • When you run your washing machine, sinks or toilets start to overflow.

You see, a clog in the main sewer line means all the wastewater that is trying to leave your home now has nowhere to go and is eventually forced back up other drain lines.