Essentials Of Truck Tires

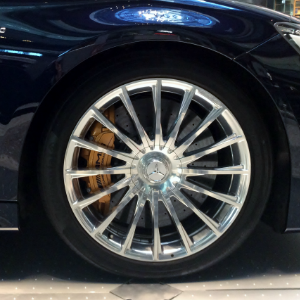
The Effect of Bigger Tires on Your Vehicle

Bigger wheels and tires are a desirable upgrade for not only the off-road extremist but many everyday drivers as well. For example, you can go to Wal-Mart and count several SUVs in the parking lot with 20-inch rims because even “Glamma” wants to look cool. Tires can really make or break your vehicle in relevance to style and performance. Driving on bad tires can take a toll on your vehicle, and upgrading to new tires can make your vehicle drive like new again. When upgrading to bigger tires you also need to upgrade your rims. There are several benefits and disadvantages when considering an upgrade to tires or wheels.

Whether it’s the price of gas, the people you spend time with, or the level of satisfaction you have with your job, one thing in life is certain, things change. It may not be a surprise your vehicle, the way it works, and how much it costs has changed significantly over the years. But have you ever thought about how much tires have changed?

Head into the showroom at any tire retailer and you will find a dizzying array of tire types, sizes, tread patterns and other variables that can have you turning right back around and heading the other way.  The good news is a step-by-step approach to choosing the right tires for your car, truck or SUV with a little knowledge can make the process much simpler and give you great results

All Season Tires – Sometimes called Touring Tires, All Season Tires deliver good performance, handling and ride quality on dry, wet and moderately snowy roads. This is the most popular tire type and can be found on most four door sedans, wagons, small SUVs and sporty coupes.  Choose All Season Tires for the most well rounded on-road performance.

Truck Tires – As the name suggests, these tires are typically found on trucks and large SUVs. Truck tires have aggressive tread and taller sidewalls to fit the size and use of large vehicles and are rated for carrying heavier loads.  Truck tires are also rated for maximum load and towing.  Choose Truck Tires for your light duty truck or large SUV if you are staying on the road most of the time.


Find the right tires for your vehicle

Truck Care

Everyone knows a professional driver’s truck is their livelihood, which makes keeping up with routine maintenance one of the most important things on the road. Routine maintenance is what keeps your truck running and your cash flow going.

Tire Selection

provides professional drivers and fleets with the best truck tires at affordable costs. Commercial drivers can stop by our state-of-the-art facility and work with our certified technicians to find the right solutions to get back on the road quickly and safely with the best range of proven products and services.

brand name tires to fit your commercial truck tire needs at more than 380


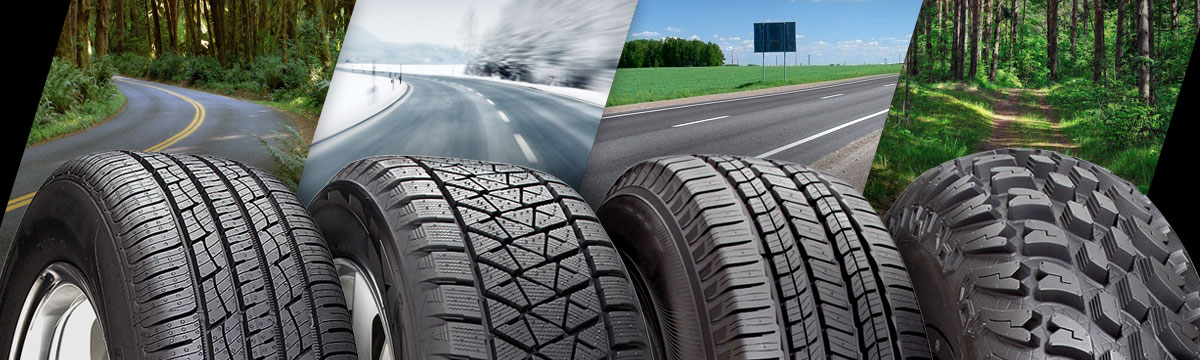
Different Types of Tires

A common challenge when buying tires is understanding the different types of tires, and which one will work best for you.

The easiest way to group tires is to start with the type of your vehicle. After determining which tire types are possibilities for your vehicle, you can determine which type is best for you based on your driving needs.

PASSENGER TOURING VEHICLES: SEDANS, CUVS, & MINIVANS

The tires designed for this particular class of vehicles are generally engineered to deliver a smooth and quiet ride, reliable all-season traction, and a long lasting tread life. Luxury vehicles that fall into the passenger touring category can find luxury tire options in both the all-season touring and grand-touring categories. While most cars in this segment will conform to these types of tires, some vehicles are modified for enhanced performance, and will need more performance from their tires.

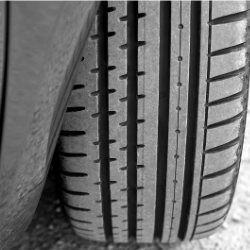
The all-season touring tire is designed to deliver good comfort and handling on the highway, as well as reliable all-season traction. It will generally feature a symmetrical tread pattern and circumferential grooves for wet weather grip.

Touring tires, also called Grand touring tires are designed to deliver a comfortable ride and reliable all-season traction, with the addition of more responsive handling. They generally have a higher speed rating than all-season touring tires, and often feature an asymmetrical tread pattern


Who is Liable When Truck Tire “Gators” Cause an Accident?

We’ve all had to deal with this problem at one point or another; road debris is one of the leading causes of environment-based automobile accidents. Anyone who drives regularly—and especially those of us who take long drives between major cities—has likely had to dodge random debris that appears right in the middle of a high-speed lane.

This debris ranges from a discarded fast-food bag to unexpectedly large hazards, like mattresses or coolers that have fallen from someone’s vehicle. However, the most common, and arguably most dangerous, type of road debris is the tire-tread left on the road when a big rig’s tire blows out.

The Terrible Risk of Road “Gators”

In the trucking world, these tire treads are known as “gators,” because they resemble the long, jagged jaw of an alligator waiting to bite the next hapless driver. Unlike the discarded fast-food bag, which simply crumples under your tire, or the occasional piece of lumber, which might cause a blow-out of your own, tire-debris gators are enormous, rubber, and often contain metal bands inside meant to strengthen the tire; and, you can’t always dodge them.

When your wheel hits a gator, there’s no telling what might happen. If you’re lucky, the jagged debris may simply shred your tire, and you’ll be able to pull safely over to the side of the road. However, many people who hit gators aren’t so lucky. A gator has the potential to curl and wrap around your tire, destroy your safe contact with the road, and may even get caught in your vehicle’s spinning axle, which can affect steering. Sometimes, the gator will pass harmlessly under one car, only to fly into the air and hit the windshield of the car behind it.

Who Is Liable for Crashes Caused by Tire Debris Gators?

Road debris is a fact of life. Things fall out off of pickup trucks, fly out of vehicle windows, and sometimes a driver may even purposefully toss his trash without waiting for the next gas station. But regardless of whether intentional or accidental, the driver/owner of the source vehicle is generally legally responsible. However, most drivers fail to take this responsibility seriously.


Tires for Towing Heavy Loads

Let’s talk about rubber meeting the road for a moment. Like, literally. Unless your truck moves around on bulldozer-style Mattracks or some other intricate running gear, good, old-fashioned rubber tires are crucial elements of a truck’s composition. And, for trucks that work hard—specifically pickups moving a lot of weight (payload or towing trailers)—using the right tires is a must.

Most trucks are fitted by the manufacturer with “Light Truck” (LT) tires, which, in the case of heavy-duty pickup trucks and sizeable SUVs, typically are “E” rated. This load-range designation means the tires are more durable (as much as 10-ply), and designed with larger beads and deeper treads than Passenger-series (“P”) rubber, for longevity and higher mileage. LT-series tires support the higher air pressures that are common for towing.

At a minimum, Load Range E tires are capable of safely supporting about 3,000 pounds. So, in the case of a dualie (six wheels), the tires collectively will provide more than sufficient grip for safely towing 18,000 pounds.

Given the huge amount of companies–well-known, major brands, and those we’re not as familiar with–that manufacture towing-capable and towing-specific tires, selecting the right rubber for your rig isn’t easy.

Here are a few options that we like. They’re all 10 ply, and capable of covering several-thousand problem-free miles (barring an inadvertent nail or other object causing damage), towing, or just driving your truck without a load attached. As a bonus, we’re also noting Load Range D and E (8- to 10 ply) tires for trailers. In the end, it makes no difference how many tires are on the ground. When you’re towing or transporting anything heavy, doing it on the right tires is critical.

Deep Cleaning Care For The Home & Family

Hacks That Will Make Cleaning Easier, Faster & Better!

Keeping a clean house often feels like a losing battle. After all, there are many surfaces in your home, and all of them attract different kinds of messes. But just because you’re facing a mountain doesn’t mean it’s insurmountable. In fact, if you’re anything like me, you probably can’t rest until you’ve figured out how to conquer the challenge. (Some people like to call this obsessive, but I prefer the word “determined.”)

I was recently reflecting on some of the DIY cleaning hacks, tips, and tricks I’ve learned and passed along, and it occurred to me that while I’ve shared some very helpful information over the years, it’s all scattered in different locations

To make things easier, I’ve compiled a list of some of my most indispensable cleaning hacks in one central place. Every tip on this list will save you time and effort — no matter what you’re trying to clean! I highly recommend bookmarking this post so you can return to it quickly whenever you have a cleaning conundrum to solve. These tips will come in especially handy when you have guests coming over on short notice.

Without further ado, read on for a roundup of 45 of my best home cleaning hacks. Just make sure to click on the green button below each item on the list to get more detailed instructions for most of our hacks. Enjoy and happy cleaning!

Use lemons to sanitize your garbage disposal.

When garbage disposals get stinky, the odor can overpower your whole kitchen. But who doesn’t love the vibrant scent of fresh lemon? This hack lets you smell that invigorating scent all the time. Even better? It couldn’t be easier. An added bonus? Your garbage disposal won’t just smell better, it will work better, too.


Things You Can Deep Clean Yourself and How to Do It

When it comes to basic cleaning and maintenance in your home, you probably have a standard routine down pat. But what about a deep cleaning strategy? Are you tempted to call in the pros when it’s time to get down to the nitty gritty areas of your home? Well, you can save your cash, because we’re bringing you the ultimate guide to deep cleaning those spots that don’t get daily—or even monthly—attention. Contrary to what you may have previously assumed, it’s not only possible but also downright easy to deep clean the following 11 things in your house.

You’re not alone if you didn’t realize that your washing machine needs its own deep clean sometimes. All sorts of gunk builds up in it while it’s doing its job. So about once or twice each year, it’s a good idea to give your washing machine a scrub down.

Step 1: Run a cycle.

Empty the machine and run a hot cycle using a washing machine cleaning agent.

Step 2: Clean the filter.

Find the filter and clean all built-up gunk out of it. You may want to wear gloves for this.

Step 3: Clean the detergent drawer.

If the detergent drawer is removable, hand wash it or put it in the dishwasher for a thorough cleanse.

Step 4: Clean the drum.

Pull back the lip of the rubber drum and check for mold and mildew. This is especially prevalent on front-loading washers. If there’s mold, scrub the drum with a mixture of bleach and water.

Step 5: Clean the outside.

Wipe down the outside of the machine. Detergent and dust can make it look dingy.

A regular deep cleaning keeps your fridge looking and smelling fresh. And since you store your food in there, a regular refresh is a good idea


How to Deep Clean the Kitchen

Last week I talked about my speed cleaning routine for the kitchen but sometimes that kitchen just needs a really deep clean!  While I probably should ideally do this more often, I generally run through this list about once every 3-4 months, skipping any steps that aren’t really needed at the time

First off, don’t be overwhelmed with the list!  I have put everything that I could think of in the checklist, but you may not need to do each task each time and some things you may do on a more regular basis anyways.  You can run through the checklist all at once, or divide it up over a couple of days if that is easier for you.  The biggest hurdle is usually just to get started!

No matter how you choose to clean, try following these simple rules to keep yourself on track and cut down on that cleaning time…

Start cleaning from the top of the room and work your way down.  This is the fastest way to get things done and will cut down on dust falling on areas that you have already cleaned.

Clean the dirtiest things first in case the mess ends up spreading around.

Work from one side of the room to the other in a systematic fashion.

Dedicate a specific amount of cleaning time and then set a timer.  Work as fast as you can within this time and don’t let yourself get distracted.

Stay in the kitchen!!  I tend to get easily side tracked when I am cleaning, and often get distracted if I leave the room and see other things that need to be done.  {Please tell me I am not alone in this!}

Quick Tidy

Before you officially start, take a few minutes to clear away items that do not belong in the kitchen and place them in a bin or basket to put away afterwards.  Put any items from the counters into the cupboards if they have a spot to go so the counters are as clear as possible.  If you are going to be doing the whole kitchen at once,  I like to clear everything off of the counters and place them on the dining room table so that they are out of the way.  It takes a few more minutes at the beginning, but will actually save time in the end.  NOTE: This is just a quick tidy looking at things that are on the floor, obviously out of place, or that you know that you want to get rid of.  Save big organizing projects for later!


How to deep clean your bedroom like a professional

Welcome to organization season! It’s that glorious time of year when you finally get down to business and go through your closets … but then you notice the layer of dust and grime that’s been building up in your home. Don’t panic! TODAY Home is here to help you tackle that cleaning to-do list.

Now it’s time to turn your bedroom into a clean and relaxing place to be. You’ll be crawling into clean sheets in a spotless room by nighttime. Let’s get started!

Here’s what you’ll need:

A powerful vacuum cleaner with attachments

Microfiber cloths or clean rags

Warm water and mild soap

Glass cleaner (or make your own by combining a 1-to-1 ratio of water and white vinegar in a spray bottle)

Disinfecting spray

A new cotton mop (the kind with the soft loops) or a clean, long-handled duster

Baking soda

Start a load of laundry

Strip the bed of sheets, pillowcases, comforter and mattress cover. Get your laundry started so the cycle can run while you’re working on the rest of the bedroom. (You should wash these every week or so.)

Down and down-alternative blankets can usually be machine washed in cool water and dried in the dryer. Just remember to set the temperature to low and add a wool ball (not a tennis ball) to the dryer to plump it up while it tumbles. Stop the cycle every 20-30 minutes to break up any clumps with your hands and let it run until you’re sure it’s completely dry.


CLEAN HOUSE TIPS FOR HOME SELLERS

TIPS FOR GETTING IT BUYER-READY

When a house is for sale, the goal is to make it as attractive as possible to potential buyers. The most cost-efficient way to spruce up the home is to clean it thoroughly. Here’s how to clean your house from top to bottom fast

GETTING RID OF CLUTTER

Many potential buyers may not see past dirt and clutter. If the house is crowded with the owner’s “stuff,” they will assume that the house is too small for their possessions. Too much clutter also poses a safety – and buying – hazard! A person who trips over items left on the stairs is unlikely to have a good feeling about the house. In addition, a clean, clutter-free environment is more attractive than a grimy, untidy one.

Begin by purging the house, including the basement, attic and garage, of items that are no longer needed. Things that are in good condition can be sold or donated to a charity. The remainder can be thrown in the trash. Rooms will appear more spacious, closets will look bigger and shelves will look roomier to potential buyers.

CLEAN HOUSE TIPS

Focus on the rooms that potential buyers are most interested in – living room, dining room, kitchen and bathroom. Look at each room as a potential buyer might and see what catches the eye first. Make that the starting point for the cleaning process. Then, follow the top-to-bottom, left-to-right rule for cleaning each room. That way, no surface is overlooked.

Give major attention to the kitchen and bathrooms. Check the labels on cleaning products to make sure they are appropriate for the surfaces to be cleaned. Abrasive cleansers provide extra cleaning power for hard-to-remove soils like food particles and grease residue in sinks. However, they may be too harsh for surfaces that are easily scratched, such as laminate or solid surface countertops. In general, liquid and gel cleansers are less abrasive than powders

Packing Services For A Removal

Home packing services

Packing is a crucial part of any move. Get it wrong and it can be costly. Our experienced, fully trained staff can take care of some or all of the packing for your move. Alternatively you may choose to pack for your self (see the bottom of this page for our Packing advice sheet)

Should you opt for the Full Packing Service we will typically send a team of packers to your home prior to your move and they will pack all belongings and prepare all items for your move. Our staff have access to quality packing materials and are trained, experienced professionals. Having our staff carry out the packing also gives you a superior insurance cover.

Antique or highly polished furniture often requires Export Wrapping for extra protection. Pictures or extra delicate items may also require crating. Our own carpenters tailor make a timber case for the item to ensure it remains in a stable, safe position during transit

You can also choose a Part Packing Service. In this instance our professional packers will pack delicate items and you will be charged per box packed by our staff. Professionally packed items benefit from superior insurance cover.

Preparing for your move

The boxes are delivered flat with sufficient tape. The boxes may have been used previously. We like to use the boxes as many times as possible to enable us to keep prices down, and would ask you to keep them clean and dry until we are able to collect them. Unless stated, they remain our property and a charge of £2.00 (plus VAT) per box will be made for boxes retained or returned unusable.


PROFESSIONAL PACKING SERVICES

Flexible Packing Services

Since 1919, over 50,000 people and their families have asked to help them move every year, which means trusting us their time, money and precious belongings.

We don’t take this effort lightly and do everything we can to make your transition as smooth as possible. Expert packing and unpacking is second nature to us, and we know that a good packing strategy is key to a positive home moving experience. We provide three flexible options to help you have the packing and moving experience that will work best for you and your budget.

Full-Service Packing Services: We’ll Take the Lead

With professional packers, you can get the assistance you need to get your move prepped and ready to go, without any investing your own time or sweat equity. We use only the best materials and techniques and employ background-checked, professional packers who are rigorously trained in our packing techniques before being charged with packing your home. This means they will show up on packing day with all of the boxes, bubble wrap, tape, protections and blankets that your items need. We move people every day of the year, so the careful handling of delicate or sentimental items is of the utmost importance to us. If you don’t have the time or means to pack your home yourself, the full-service option takes a lot of stress off you while we handle it all.

Partial Packing: A Team Effort

Packing takes a little more than just putting items in boxes— there’s a science to it. If you’re uncomfortable handling fragile, valuable, large or awkward items, we can take those off your hands and give them the care they need, while still leaving you the flexibility to pack the rest yourself. With partial packing services, we’ll still personally blanket wrap furniture, appliances or other items that require it before we load them onto our trucks

DIY Packing: The Budget-Friendly Option

If you’re on a tight moving budget, or simply prefer to handle packing yourself, you can absolutely do your own packing. Your move coordinator can give you packing tips to help you get started, and then on moving day the furniture and heavy items will be carefully protected by us alongside the items you packed yourself.


HOW EARLY SHOULD I PACK FOR A MOVE?

Have you just closed on your dream house or been approved for the perfect apartment? You probably feel like a huge weight has lifted off your shoulders. While finding a place to live lets you cross a big item off your to-do list, you now have a daunting task ahead of you: pack up your entire house in cardboard boxes just in time for moving day.

There’s no doubt that packing is the single most time-consuming aspect of moving. How early should you start packing for a move? The short answer: start as soon as the move is confirmed. To help you stay on track, follow this packing calendar as moving day approaches.

6 to 8 Weeks Before the Move

Start cleaning out the basement, attic, garage, and closets. Decide what to keep and pack up whatever you won’t need before moving day. Then, make separate piles to discard, donate, or sell.

Research the moving companies you’re interested in hiring. Read testimonials, compare rates, and ask for moving quotes. Request proof of insurance from every company you consider. Remember, hiring an uninsured mover could leave you responsible for property damage or personal injury claims.

4 to 6 Weeks Before the Move

Arrange a moving sale. By completing this step far enough in advance, you allow time to donate or discard whatever items don’t sell.

Select a moving company and confirm your moving date.

Order packing supplies. Hopefully, your moving sale helped you downsize so can order fewer boxes and make moving day easier.

1 Month Before the Move

As you begin the actual packing process, adopt a labeling system to keep your belongings organized. Consider taking pictures of the contents of each box to help you find what you’re looking for later. You can also download a packing app like Move Planner or Sortly to help you inventory your belongings.

Begin packing decorations that serve no practical purpose and items you seldom use, such as China, holiday décor, and anything in your storage room.

Contact charities and arrange to have items picked up that didn’t sell during your moving sale.


Packing Services

moving and packing company. Our packing services include unpacking and disposal. They are available for both residential and commercial moves. Moving your home or moving a business is labor intensive both mentally and physically. We are committed to reducing the labor burden on you during the moving process. To help you relax we offer full packing and moving services. We pack and move nearly anything, including your prized possessions, wine vaults, pianos, chandeliers, flat-screen TVs, art and antiques. No move is too big or too small for us.

Professionally Trained Packers

We have professionally trained packers and movers to get your job done right. Our company fully licensed and insured company and all of our Connecticut movers and packers follow the established industry best practices. These include the safest and most efficient packing methods so that you have a great moving experience.

Movers To Pack my Home?

Reduces the most stressful part of moving, the packing process.

Our professional movers pack for you.

It frees up your time to do more important tasks.

Using trained professional packers minimizes move damage.

Charge an hourly rate for packing services.

This is the fastest option to move out of a home or place of business.

Your home is fully prepared for loading day, resulting in a more organized and efficient move.

Packing For Your Move

We know packing for a long-distance move is often challenging. That’s why our professional packers are trained to pack your belongings safely and securely to avoid damage. We offer packing supplies and moving boxes at a cost-effective price.

Packing and Unpacking Services

Our packing services allow you to pack and move as much, or as little, as you desire. We offer partial packing service, which is like an extra set of hands to help you to pack up your delicate items and other possessions and to help you to get your packing done fast. Additionally, we offer full packing services, where we will pack up your entire house. This service includes packing dressers, closets, basements, attics and more.


Packing & Unpacking Services

Expert Packers

Time and time again our customers rely on us to pack their things as part of the move. Our expert team has helped many people with packing effectively for local and long distance moving.

Who has time for packing?

On the day of the move, if you feel like you’re running out of time – don’t worry, we’ll finish packing for you. We have all the right supplies on the truck. This saves a lot of stress of having to pack before you move. When we come to move you, we will wrap and protect your furniture, artwork, lamps, TV’s electronics – in addition we can take care the rest of your belongings

movers are so thorough that you’ll need to tell them what NOT to pack – by default, everything would be wrapped and packed to perfection

If your moving day is approaching and you see that you are out of time, don’t worry – we’ll pack what you don’t have time to pack

if you’re limited in time and willing to do other things like hire professional movers and packers – we can guarantee that nothing will be lost or broken because it will be professionally labeled and packed.

team help you prepare your belongings before you move!

In this day and age, every help you need is a simple phone call away. And if you are moving, you already know you will be needing help galore. Once you choose your reliable relocation professionals, even though you might think otherwise, the job is nowhere near done. If you feel like doing the bare minimum for your relocation, then you need to take the numerous moving services movers offer into consideration. One of the most common things people need help with is packing. If you are wondering what makes packing services Brooklyn so useful, all you have to do is ask yourself: `Do I feel like losing precious days of my life on something other people can do for me?`

We are efficient

There is nothing worse than hiring movers, paying for their services, and having them drag on your relocation for days, sometimes even weeks. If you hire our local or long distance movers and opt for our packing services, you can rest assured you will get only the most efficient individuals. Every person that comes to your house to do the packing will be highly trained, experienced and have all the tools necessary for undertaking this task. Moreover

Myths You Mustn’t Believe About Electrical Home Inspections

Electrical Inspection Testing – A Guide to the Basics

What is Inspection?

It is carried out before the testing and the installation is normally disconnected from the supply.

The point of inspection is to verify that the installed equipment:

Complies with relevant standards – this is normally a mark of certification by the installer or manufacturer

Is the correct type and installed in accordance to the Regulations

Not damaged or defective which would cause a safety issue

The Inspection includes the checking of several items which are relevant to the installation. The checking can also take place, if necessary, during installation. The items checked are listed in Regulation 611.3 ‘Inspection’ BS7671.

What is testing?

It is important that testing is carried out using the correct equipment and methods and the results are compared with relevant criteria contained in Regulations 612.2 to 612.13

Testing also needs to be carried out in a specific order before the installation can be switched on. The test order is detailed in Regulations 612.2 to 612.6

If any part of the testing fails to comply, that test plus any other testing already carried out has to be repeated once the fault has been fixed. This is because the results of the tests may not be accurate and may have been influenced by the fault.


Electrical Inspection and Testing Procedures

Regular testing and inspection of both fixed electrical installations and portable appliances, completed by qualified electricians, is the most effective way to ensure compliance with health and safety law.

Identifying and rectifying defects helps to maintain safe functioning of electrical equipment. Testing should consist of both scheduled visual inspections and tests. Electrical inspection and testing procedures are determined by the type of installation:

  • Initial Verification Inspection and Testing: For new build or alterations to fixed electrical installations
  • Periodic Inspection and Testing: Fixed wire tests of existing electrical installations
  • Portable Applicance (PAT) Testing: Portable electrical appliances

Testing should be performed by qualified electrical engineers, experienced in electrical inspection and testing procedures and use of the relevant testing equipment. In addition, basic, visual inspections of electrical equipment (both fixed installations and portable appliances) carried out on a regular basis can identify wear, tear, faults and defects before developing into a serious hazard.

Electrical inspection and testing procedures should be approached on a planned, preventive basis, taking into consideration:

  • Appropriate frequency of testing and inspection
  • Record keeping
  • Equipment labelling


Four myths about electrical safety that may surprise you

Plant safety is much more than just tasks on a checklist. It requires a commitment from every employee—from management to line workers—to maintain a culture of safety in all aspects of the operation. Over time, interpretations of certain safety standards can stray from the original intent creating some myths about how best to meet safety requirements.

Myth #1: “Inconvenient” is the same as “infeasible” when it comes to de-energizing equipment for maintenance

There’s no doubt that it is almost always inconvenient to shut down power unexpectedly to work on a piece of equipment. But that doesn’t mean it’s infeasible. The Occupational Safety and Health Administration (OSHA) permits working on an energized circuit only under certain conditions, including when it’s “infeasible” to shut down power due to increased hazard. However, there is a tendency to allow employees to work on live circuits just because it’s “inconvenient” to shut down power. This adds unnecessary risk that often leads to accidents.

In situations where it actually is infeasible to shut down the power, only electricians and technicians qualified to work on energized systems should perform the work. They should take all precautions, including wearing proper personal protective equipment (PPE) and using tools certified for the conditions they encounter.

Myth #2: The more PPE the better

Whether to wear PPE, and how much to wear, are not personal decisions. A component can fail at any time. Perfectly good breakers can fail suddenly during troubleshooting. If an arc flash occurs while simply opening a cabinet, wearing the correct PPE can mean the difference between surviving or not. Electricians and technicians must follow the detailed PPE standards developed by the National Fire Protection Association (NFPA) 70E Standard for Electrical Safety in the Workplace. However, requiring workers to wear PPE rated for a much higher hazard level than the environment calls for will not necessarily make them safer.

“More PPE is not necessarily better,” says Kevin Taulbee, Electrical Engineer and Safety Trainer at Power Studies, Inc. “Having the right PPE is what counts. Performing proper job hazard analysis is important for equipping workers with the correct PPE. Too many people just go out and purchase arc flash moon suits and thick, high voltage linemen gloves for their in-house maintenance and electrical workers. Class 2 electrical gloves aren’t necessary if they never get into anything over 480 volts and they offer much less dexterity. As a result, an electrician may be more likely to drop a tool or lead when working in an energized panel.”

Myth #3: All test leads and fuses are created equal

Often technicians regard test leads and fuses as basic commodity components without giving quality much thought. Regardless of the quality of the multimeter, it’s only as safe as the test leads used with it and the fuses inside. These components provide critical protection against power surges and voltage spikes that can cause serious injury to the user.

Choosing the right test leads

The primary job for test leads is to connect the digital multimeter to the equipment being tested, but they also provide a first line of defense against electrocution. Test leads that are poorly made, worn, or aren’t rated for the job at hand, can produce inaccurate readings and may pose a serious shock hazard if touched to the wrong wire. When choosing test leads look for:

High quality materials and rugged construction

Rating for the appropriate category and voltage level of the application. The CAT rating on the leads should match or exceed the category of the DMM.

Exposed metal that matches the energy potential of a specific measurement.

Retractable probes, probe tip covers, or probes with shorter tips to avoid an inadvertent short circuit.

Pick high quality replacement fuses

Today’s safety standards require digital multimeters to include special high-energy fuses that are designed to keep the energy generated by an electrical short, within the fuse enclosure. This protects the user from electric shock and burns. When it’s time to replace fuses always choose the high energy fuses approved by the meter’s manufacturer. Cheaper generic replacement fuses increase the risk of serious injury.

Myth #4: The only way to accurately measure live voltage is with test lead contact.

In the past, attaching test lead probes or alligator clips directly to electrical conductors was the best way to get accurate results. However, this requires metal-to-metal contact, which increases the risk of arc flash and potential harm to both the person doing the measuring and the equipment being measured.

Recently a new technology was introduced that detects and measures voltage without metal-to-metal contact. This technology isolates the measurement tool from the voltage source under test. To measure voltage, electricians and technicians just slide a single conducting wire into the open fork of the handheld test tool. Since they aren’t exposed to contact points with live voltage, the risk of electrical shock and arc flash is reduced.

The myths listed above represent just a small sampling of the safety issues to be considered when working on energized equipment. The best way for a facility to ensure that employees fully understand and follow all the relevant electrical safety regulations is to develop and maintain a solid safety culture based on the needs and environment of that specific facility.


Software Testing – Levels

There are different levels during the process of testing. In this chapter, a brief description is provided about these levels.

Levels of testing include different methodologies that can be used while conducting software testing. The main levels of software testing are −

  • Functional Testing
  • Non-functional Testing

Functional Testing

This is a type of black-box testing that is based on the specifications of the software that is to be tested. The application is tested by providing input and then the results are examined that need to conform to the functionality it was intended for. Functional testing of a software is conducted on a complete, integrated system to evaluate the system’s compliance with its specified requirements.

There are five steps that are involved while testing an application for functionality.

Steps    Description

I           The determination of the functionality that the intended application is meant to perform.

II          The creation of test data based on the specifications of the application.

III        The output based on the test data and the specifications of the application.

IV        The writing of test scenarios and the execution of test cases.

V          The comparison of actual and expected results based on the executed test cases.

An effective testing practice will see the above steps applied to the testing policies of every organization and hence it will make sure that the organization maintains the strictest of standards when it comes to software quality.


Let’s see more details about these Testing types.

Alpha Testing

It is the most common type of testing used in the Software industry. The objective of this testing is to identify all possible issues or defects before releasing it into the market or to the user.

Alpha Testing is carried out at the end of the software development phase but before the Beta Testing. Still, minor design changes may be made as a result of such testing.

Alpha Testing is conducted at the developer’s site. In-house virtual user environment can be created for this type of testing.

Acceptance Testing

An Acceptance Test is performed by the client and verifies whether the end to end the flow of the system is as per the business requirements or not and if it is as per the needs of the end-user. Client accepts the software only when all the features and functionalities work as expected.

It is the last phase of the testing, after which the software goes into production. This is also called User Acceptance Testing (UAT).

Ad-hoc Testing

The name itself suggests that this testing is performed on an Ad-hoc basis i.e. with no reference to the test case and also without any plan or documentation in place for such type of testing.

The objective of this testing is to find the defects and break the application by executing any flow of the application or any random functionality.

Ad-hoc Testing is an informal way of finding defects and can be performed by anyone in the project. It is difficult to identify defects without a test case but sometimes it is possible that defects found during ad-hoc testing might not have been identified using existing test cases.

Accessibility Testing

The aim of Accessibility Testing is to determine whether the software or application is accessible for disabled people or not.

Here, disability means deaf, color blind, mentally disabled, blind, old age and other disabled groups. Various checks are performed such as font size for visually disabled, color and contrast for color blindness, etc.

Tax Planning Strategies For A Bigger Tax Refund

Inheritance tax planning and tax-free gifts

Find out how to give away money from your estate to reduce your inheritance tax bill, and what is a ‘potentially exempt transfer’

Can I give money away to avoid inheritance tax? If you’re estate is worth more than $325,000 (or $650,000 for married couples and civil partners), it’s likely some of it will pass to HMRC in inheritance tax when you pass away.

One of the most straightforward ways to make sure tax isn’t charged unnecessarily is to consider giving away assets while you are still alive. You’re allowed to make some gifts without any tax being due after your death. These usually include gifts to your spouse or civil partner, or if you’d like to leave money to a charity. Most of the time it also includes gifts to individuals made more than seven years before your death.

Gifts to your family or other individuals If you wish to leave money to other family members, such as your children, it’s a good idea to plan how you want to do this.

Gifts that benefit you You can’t gift someone something that you will still maintain a benefit from in your lifetime and benefit from the gifting rules.


Tax-efficient accounts and investing methods to help make you a smarter tax planner

Preparing for tax time

Organizing your tax information early may help you lessen your tax-season stress.

Tax-efficient investing

Tax rules and rates may change, but it’s always a good idea to keep taxes in mind when making investment decisions.

Retirement investments and taxes

Understanding tax-advantaged investment strategies for retirement—and when to withdraw your funds—may help you build your investments and lower your tax bill.

Tax-savvy college savings plans

Discover how 529 college plans may help you save money for higher education expenses and potentially benefit from tax advantages

Estate planning and inheritances

An estate plan may help you minimize gift and estate taxes and preserve more of your assets for those you care about.


Tax Avoidance Is Legal; Tax Evasion Is Criminal

Individuals and business owners often have more than one way to complete a taxable transaction. Tax planning evaluates various tax options to determine how to conduct business and personal transactions in order to reduce or eliminate your tax liability.

Although they sound similar “tax avoidance” and “tax evasion” are radically different. Tax avoidance lowers your tax bill by structuring your transactions so that you reap the largest tax benefits. Tax avoidance is completely legal—and extremely wise.

Tax evasion, on the other hand, is an attempt to reduce your tax liability by deceit, subterfuge, or concealment. Tax evasion is a crime

How do you know when shrewd planning—tax avoidance—goes too far and crosses the line to become illegal tax evasion? Often the distinction turns upon whether actions were taken with fraudulent intent

Business owners often find themselves subject to more scrutiny than wage-earners with a similar level of income. Why? Because a business owner has more options to avoid tax, both legally and illegals


Adding Things Up Some Year-end Tax Planning Tips for Your Medical Practice

Thanksgiving is almost upon us and the holiday season is just around the corner. What better time than now to think about year-end tax planning for your practice, as well as yourself?

Annual Bonuses

There is no better way to show your appreciation toward employees for all of their hard work than a bonus at the holidays. Not only will it help to improve morale and keep them working hard into the New Year, but, if paid out before Dec. 31, it is a deductible expense and lowers your taxable income.

In terms of your own bonus, there are more items that should be considered. If you are an entity whereby the tax is paid at the individual level, a year-end bonus has no impact on taxes paid. Here, the consideration should be on the cash needs of the practice and owner.

Retirement Plan Contributions

Retirement-plan contributions are one of the most valuable tax -saving techniques that you can utilize. By making such a contribution, practices are able to reduce current taxes, while the individuals are able to defer taxes until they retire and take distributions. Another nice feature is that, except for employee deferrals, you have 2 1/2 months after year end to fund the contribution.

Medical and Office Equipment

For those practices that may have a few pieces of outdated equipment, or if there is that new machine you have been eyeing for some time, now may be the perfect time to make that purchase. The recently passed Small Business Jobs Act of 2010 contains some great provisions relative to the purchase of new medical and office equipment.


Tax Planning

Tax planning involves conceiving of and implementing various strategies in order to minimize the amount of taxes paid for a given period. For a small business, minimizing the tax liability can provide more money for expenses, investment, or growth. In this way, tax planning can be a source of working capital. Two basic rules apply to tax planning. First, a small business should never incur additional expenses only to gain a tax deduction. While purchasing necessary equipment prior to the end of the tax year can be a valuable tax planning strategy, making unnecessary purchases is not recommended. Second, a small business should always attempt to defer taxes when possible. Deferring taxes enables the business to use that money interest-free, and sometimes even earn interest on it, until the next time taxes are due.

Experts recommend that entrepreneurs and small business owners conduct formal tax planning sessions in the middle of each tax year. This approach will give them time to apply their strategies to the current year as well as allow them to get a jump on the following year. It is important for small business owners to maintain a personal awareness of tax planning issues in order to save money. Even if they employ a professional bookkeeper or accountant, small business owners should keep careful tabs on their own tax preparation in order to take advantage of all possible opportunities for deductions and tax savings. Whether or not an entrepreneur enlists the aid of an outside expert, he or she should understand the basic provisions of the tax code.

GENERAL AREAS OF TAX PLANNING

There are several general areas of tax planning that apply to all sorts of small businesses. These areas include the choice of accounting and inventory-valuation methods, the timing of equipment purchases, the spreading of business income among family members, and the selection of tax-favored benefit plans and investments.

Accounting Methods Accounting methods refer to the basic rules and guidelines under which businesses keep their financial records and prepare their financial reports. There are two main accounting methods used for recordkeeping: the cash basis and the accrual basis. Small business owners must decide which method to use depending on the legal form of the business, its sales volume, whether it extends credit to customers, and the tax requirements set forth by the Internal Revenue Service (IRS). The choice of accounting method is an issue in tax planning, as it can affect the amount of taxes owed by a small business in a given year.

Accounting records prepared using the cash basis recognize income and expenses according to real-time cash flow. Income is recorded upon receipt of funds, rather than based upon when it is actually earned, and expenses are recorded as they are paid, rather than as they are actually incurred. Under this accounting method, therefore, it is possible to defer taxable income by delaying billing so that payment is not received in the current year. Likewise, it is possible to accelerate expenses by paying them as soon as the bills are received, in advance of the due date. The cash method is simpler than the accrual method, it provides a more accurate picture of cash flow, and income is not subject to taxation until the money is actually received.

Rodent And What You Can Do To Reduce Infestation

Best Ways to Help Get Rid of Mice

Eliminate entry points.

Building mice out, or rodent-proofing your home, is an effective way to stop mice infestations from expanding or ever occurring in the first place. Defend your home from mice by eliminating points of entry and easy access. This can be difficult due to a mouse’s ability to squeeze itself into even the smallest of openings (one-quarter of an inch and up). A good rule of thumb is if you can fit a pencil into a crack, hole or opening, a mouse can get through it.

Use mouse traps.

The best way to help get rid of mice in an ongoing infestation is with mouse traps. The classic wooden snap traps will do the trick for light to moderate mouse populations, but keep in mind that most people underestimate mice infestations. It’s not uncommon to lay one dozen traps for just one mouse – or what you think is just one mouse. Use plenty. It’s also a good idea to lay many different types of traps. Use bait traps, multiple-capture live traps and glue traps in conjunction with the wooden traps. This gives you a better chance at catching all of the mice, since some might be keen to certain types of traps and know to avoid them.

Choose the best bait for mouse traps.

You can use whatever food the mice have been eating in your home for bait, or mouse-approved favorites such as chocolate, peanut butter, bacon, oatmeal, dried fruit or hazelnut spread. When you’re ready to set the baited trap, tie the bait to the trigger with fishing line or dental floss. This will make sure the mice get what’s coming to them without “making off with the cheese.” You can also secure the bait with a hot glue gun. Replace with fresh bait every two days. If the food isn’t working, you can try using nesting material such as cotton balls or feathers

Proper placement of mouse traps is critical.

Place the traps perpendicular to the walls, with the trigger section facing the baseboard. This causes the mouse to run directly into the bait as it naturally scurries along the walls, instead of running over the trap from the wrong direction, triggering it prematurely. Mice don’t travel more than 10 or 20 feet from food sources and nesting areas (i.e., their territory), so place the traps anywhere you see mice or signs of mice, such as rodent droppings or “rubbings” on baseboards and walls. Change trap locations every two days or so. Mice are naturally curious so they won’t avoid traps like rats will.

Bait stations.

Bait stations (or bait packages) are sealed packets containing meal or pellets. They typically come in plastic, paper or cellophane wrapping, allowing the mice to easily gnaw through and get at the preserved, fresh bait. The mice feed on this bait and die. While helpful in getting rid of mice, these products are best handled by trained pest management professionals to ensure the safety of you, your children and your pets.


How to Get Rid of Rats in Your Home

Rats can be a problem in the home. Unfortunately, you may not see them until there is a large infestation and it becomes more difficult to get rid of the rats. Rodents can cause a great deal of damage, contaminate food, and carry disease. Fortunately, there are ways to effectively kill the rats, with the two best ways as traps (including both open and enclosed rat traps) and baits

How to Find the Rats

The first step in ridding your home of rats is finding where they are living. Because they are nocturnal (most active at night), rats aren’t often seen in the open during the day. But, it is easy to see signs of their presence.

Rat Traps

Traps can be an easy and inexpensive way to get rid of rats. Traps are relatively cheap, if unbaited, can be left in place for long periods. But all traps, baited or unbaited, must be regularly inspected, as a dead or dying rat or a food bait can attract secondary insects and cause an infestation. Traps should be set where rat signs are seen and in out-of-the-way, hidden areas, especially in attics, basements and near food sources. Always take care to keep traps away from potential triggering by children or pets.

Baiting Traps. Dry pet food can be a very attractive bait for rats, so can nuts, dried fruits and dried meats, such as bacon. These can be attached to the trap with thread, wire or even glue. For rats, soft baits, such as peanut butter and cheese, are not always effective, because the rat can sometimes pull off the bait without snapping the trap.

Rodenticides. Rodenticides are the poison pesticides for the killing of rats and mice. If the rat population has gotten high, it may be best to contact a licensed pest control professional, as they have access to and knowledge of proper use of bulk rodenticides. Otherwise, it is generally recommended that homeowners use traps to control and eliminate rats. When any pesticide or rodenticide is used, all label directions must be read and precisely followed. Some rodenticide baits can be bought at home stores, but a new EPA regulation has now limited these to specific baits sold only in disposable, ready-to-use bait stations. This can help protect children and pets from inadvertent contact with or eating of these poison baits.


How to get rid of mice and rats in your house

If you have rats or mice in your house, you need to know what signs they leave, what problems they cause and how to get rid of mice and rats humanely. Our guide explains how to get rid of rodents, such as mice and rats, and prevent them from returning to your home

Winter nights can mean a mouse in the house or even a rat. But poisoning isn’t the only way to get rid of them – humane mouse traps and deterrents are both possibilities that cause far less unnecessary suffering.

You’re also more likely to see mice and rats in your garden during winter, but so long as they stay in the garden and don’t cause damage to your shed or anything else, they shouldn’t cause any problems out there.

Which rats and mice enter houses?

House mice (Mus musculus), wood mice (Apodemus sylvaticus), yellow-necked mice (A. flavicollis) and brown rats (Rattus norvegicus) are all common in houses. Of the three mice, the one you’re most likely to encounter at home is the wood mouse, as this species is even more common in houses than the house mouse

What attracts mice and rats to your house?

There are two main things that can attract mice and rats to your house – food and shelter. If you don’t tidy up properly and there’s food waste on the floor or surfaces, rodents are going to love it!


Shining a new light on rodent infestations

When a rat or mouse infests a kitchen, restaurant, food store or food processing factory, one of the first tasks is to find out where they are and the routes they take to get to food and shelter. The larger the building, the harder it is to locate the rodents and their hiding places.

The Fluorescent Tracking Gel is making this task much easier and Rentokil technicians are already receiving positive results in field trials on customer premises. Rodents are intelligent, agile and small, they easily into places humans find difficult to access or may not think to look. They can climb cables, wires, pipes, conduits, squeeze through gaps and gnaw holes through many types of material to gain access to buildings and hidden spaces.

The Fluorescent Tracking Gel has been deployed on customer premises worldwide with outstanding results, helping to solve infestation problems that previous conventional control measures could not solve. This new innovation has quickly become a key component in identifying root causes of infestations and adds a smarter tool to the resources of our pest control technicians.

Why are rodent surveys important?

The first step in getting rid of rodents is to survey the infested property to find out where they are and how many there are. Even today, many pest controllers simply lay down bait or traps, without an understanding of the best places to position them on the site. A low-cost service without a proper survey can result in an ongoing problem for businesses when rodents return and cause recurring infestations. The customer often ends up with larger infestations and much higher pest control bills due to the delay in addressing root causes.

Rodent agility

Rats and mice are highly agile and enter buildings in many ways, so you need to inspect all the vulnerable places that they can access


How to Get Rid of Mice with Natural Ingredients

Don’t be deceived by Ratatouille, house mice aren’t as friendly (or as clean and sanitary) as Remy. They live in dirty places such as sewers, and that’s how they carry germs and disease into the house.

Use coffee powder to match the strong smell of mice

This one material is almost in every house. But why does it have to be coffee powder?

It turns out that mice have a sharp sense of smell, to trace the tracks it leaves behind. Similarly, black coffee powder has a sharp aroma disliked by mice. Hence, it will avoid areas that smell like coffee powder.

Repel mice with Noni Fruit

Another way to repel mice is to use noni fruit, also known as Indian mulberry, among other English names. Apart from its health benefits, this fruit can also repel mice.

Don’t get dumped! Sprinkle your eggshells in rat-infested corners

When making scrambled eggs or omelets in the morning, eggshells are immediately thrown away. But now, you can use it as a rodent repellent at home.

Bathroom Remodelling Ideas That Work

BATHROOM REMODEL CHECKLIST

Remodeling a bathroom is an excellent way to refresh your space and increase your home’s value at the same time. Remodeling a bathroom can be as simple as applying a new coat of paint or buying a new sink and fixtures. Or you can go big – start with a fresh slate and give the bathroom an entirely new look. Whatever updates you’re dreaming of, it will pay to plan ahead

On average, remodeling a bathroom costs between $5,000 and $10,000. The more major the project, the more it will cost. One way to control costs is to prepare well in advance

Set a list of priorities and expectations.

What is your big-picture goal?

When does the job need to be finished?

Set a budget.

How much do you want to do? New shower and more square footage? Or just a new sink and a coat of paint? Make these decisions now before you start remodeling. Don’t forget the details, like the knobs on the new cabinets and the light switch covers.

Choose a color palette or design style.

Stay consistent with color and material choices, and choose options that are cohesive with the design in the rest of the house.

Source your materials and permits.

Talk to manufacturers. Look into alternative eco-friendly, low-VOC or moisture-resistant materials.

Consider upgrades such as a bathroom fan, electric heater or radiant-heated floors.

Try to purchase as much as possible before you begin.

Plan logistics.

Find out if you’ll need to plumb the toilet or shower or if you can you use existing pipes.

Check shipping periods to make sure you can get all the materials in time.

Line up a contractor or, if you’re doing the work yourself, clear your schedule.

Will the remodel require enough tear-out that you’ll need to seal off other rooms from dust or noise?

Anticipate obstacles.

Will the subfloor need to be replaced?

Will the new tub fit through the door?

Can the existing wiring be used?

Will the inspection officer be available during the remodel process?

Create a timeline.

Make a list that follows a logical timeline: Don’t repaint before caulking, and don’t finish the tile floor before installing the shower.

Get creative.

Think outside the box for a unique look: shiplap walls, board and batten, beadboard or tiles.

Look for unique lights and furniture at thrift stores.


One Day Bath Remodel

If your bathroom is reminiscent of decades past or is simply in need of some serious TLC, Bath Planet can have your bathroom looking fresh and new in as little as a day, for just a fraction of the price of a traditional remodel! Our remodels are completely customized and retrofitted to your existing bathroom for easy installation and minimal disruption to your daily routine.

One Day Bathroom Remodel

At Bath Planet our experts use a superior process to evaluate your bathroom by taking measurements and designing a new bath, shower, or surround for you. Using your measurements, a brand new bath system is designed to create a brand new look and feel to match your bathroom vision. Not only do we replace bathtubs and showers, but we also convert bathtubs to showers and vice versa. We can also renovate your existing bath or shower to be more accessible for those with limited mobility.

Our one-day bathroom renovation options are nearly endless! With so many different color and design patterns to choose from, you shower or bath can be customized to suit any style. We also offer a variety of accessories like shelving, corner caddies, and hardware that can be custom fit to your new one-day bath replacement


Bathroom Remodel Costs: Ways You Can Save

If the thought of remodeling your bathroom puts stars in your eyes, the price tag may quickly bring you back down to earth. Americans typically spent $5,500 per bathroom remodel in 2017, according to a U.S. Census survey of homeowners. A remodel is defined as a job that makes substantial changes to a room but stops short of building or tearing down walls. A major renovation, on the other hand, typically set home-improvers back $10,000, according to the same survey.  In yet another source, Remodeling magazine suggests a midrange bathroom remodel costs about $18,500, on average, according to its analysis of remodeling software estimates.

Breaking down the cost of your bathroom remodel

In a breakdown of bathroom remodeling costs, the biggest single expense is labor: Around 20% of the total price pays for professionals to tear out old elements and install new ones, according to the National Kitchen and Bath Association.

You could do the design and installation yourself, but you’d better be sure you have the know-how. Professionals have education, skills and experience that will help keep your project on track by avoiding mistakes and dealing with hidden problems that can emerge during a renovation.

How to plan your bathroom remodel project

Determine the goal: When remodeling a bathroom, set your sights on added comfort and functionality, not just resale value. The average bathroom remodel recoups just 64.8% of its cost in increased home value, according to Remodeling magazine’s most recent Cost vs. Value report.

Create a budget: “Have a wish list and a must-have list,” says Colin Shaw, owner of Shaw Remodeling in Niantic, Connecticut. First, price non-negotiable elements. Once your list is solid, get an estimate of installation costs from several potential contractors. Soon you’ll have a rough idea of what the total project will cost. If there’s still room in your budget, take a second look at wish list items to see what else can be included.


QUICK TIPS TO CHOOSE A BATHROOM RENOVATION CONTRACTOR

According to a survey, 83% of the Canadians every year opt for a bathroom renovation project. The fun fact is that, a good section of manipulated by those not-so-realistic DIY videos go frenzied and take up the task by themselves. However, people with minimum IQ will always do what is necessary, i.e. hiring bathroom repair contractors Toronto.

The complexity of the job entails expertise and no novice touch. So, if you are planning to remodel your bathroom this summer, without looking further choose one of the best bathroom repair contractors Toronto in town. Well, getting the superlative contractor is also a task. While choosing a service, you need to consider a few factors to level up the remodeling game.

Look for Credentials

This is one of the foolproof ways to settle for one of the top bathroom repair contractors Toronto in your locality. A good service will never be hesitant to produce the credentials to their clients. Therefore, if a contractor fails to provide the relevant certificates and license, you know which route to choose. Never compromise in terms of verifying the credibility of a contractor as it may to lead you towards having potential damage to your asset.

Experience Counts

Experience matters any day in every field and bathroom repairing is no exception to it. To reach the right contractor, pay heed to the years of experience. Not to mention, a contractor service can only sustain for a prolonged period if and only if they are able to satisfy their customers with their skill and proficiency. Take a look at their work portfolio to get a better idea of their experience.

Schedule an Appointment

This is indeed a smart step to consider. For instance, you can narrow down the list of the contractors and arrange meetings accordingly to decide for the best one. Generally, professional bathroom repair contractors Toronto never turn down such meetings. In such discussions, you must propose your estimated budget for bathroom remodeling work.


Tips for Hiring a Bathroom Remodeling Contractor

Hiring a bathroom remodeling contractor can save you loads of misery and time due to some of the difficult operations like electrical, tiling and plumbing that are involved. However, before you select the appropriate contractor, you need some checklist of your wants and needs. You need to hire someone you can get along with and trust to do your job well. Below are 3 tips for hiring remodeling contractors to help you make an informed decision

Do your homework

It is important that you have a clear plan of what you want for both your project and the contractor. For your renovations, you need to have a clear idea of how you want your bathroom to look like and to have a realistic budget of how much you are prepared to spend. As for the contractor, you want to focus on individuals who have prior experience with your type of project. You need to get recommendations from friends, family, or even a building inspector about bathroom contractors in your area.

Contractors are not necessarily designers

Some bathroom remodeling contractors are inclusive of everything that has to do with a bathroom renovation. This means that they will help you with every aspect of the remodel, from the initial design to the very last towel bar screwed into the wall. However, other bathroom remodeling contractors want you to come into the project with bathroom design plans ready for them to execute.

Supply your own materials and save money

Be aware that every item that the contractor buys will have his/her commission tacked onto it. However, most bathroom remodeling contractors are perfectly fine with you purchasing items on your own. These could be decorative towel bars, mirrors, toilets or light fixtures. Keep in mind though that the lowest price quotations may not always be your best pick.

The ‘Sugar Glider’ Possums

How to Trap a Possum With Ease

Physical Characteristics

All opossums range about 21 to 36 inches long, measured from nose to the tip of their tail. They’re similar in size to a cat or a small dog. Some of their more identifiable characteristics are their pointed head and pink nose, a long, hairless tail, and hairless, pointy ears. Their mouths contain 50 small, sharp, teeth. They also feature opposable thumbs on their hind feet.

Common Species

Virginia Opossum

The Virginia Opossum is the only opossum species native to America, and it is the only variety known to cause problems in the U.S.

Common Opossum

The Common Opossum (also known as the Southern Opossum) prefers habitats near water like tropical forests, but will also be found close to people in urban areas.

Gray Short-tailed Opossum

Much more difficult to spot because of its size and relatively small geography, the gray short-tailed opossum is known to be more aggressive than other species, especially while they are mating.

Opossums Versus Possums

The opossum is native to North and South America, while possums are only found in Australia.

Although they’re named after each other because of their resemblance, possums have longer, furry tails while opossum’s tails are hairless.

In general, possums are fluffier, smaller, and with less severe features.


How To Trap Opossum

The traps should be set in locations the animal frequents or where it is causing damage. Fish, canned cat or dog food are good opossum baits. To readily entice the opossum into the trap, use a small trail of bait leading to the trap. All traps should be checked in the morning and evening, so that captured animals may be dealt with in a humane manner. Release the animal several miles. Check with your game and wildlife department before trapping and releasing them.

Description/Biology

Opossums have a repulsive, musk-like odor and can be an occasional nuisance when they enter crawl spaces, under decks, garages, and similar areas. They nurse in the mother’s pouch for about 3 months.The average number of young is 6, but as many as 13 may be born.

  • The opossum is 2-3 feet long. Its head is white to yellowish with a pink nose, black eyes and bluish black, naked ears.
  • Adults are long-haired, light-gray, and about the size of a large cat weighing 4-15 lbs.
  • It has a long scaly tail, black at its base, grading to yellow-white or pink for the rest of its length.


BAITING POSSUM TRAPS WITH THE BEST BAIT FOR POSSUMS AND OTHER OPOSSUM BAITING TIPS

Although they aren’t particularly finicky eaters, the best possum bait is fish or apples. Baiting opossum traps with canned pet food also works well. While there are differences of opinion as to the best bait for opossums, all professional trappers agree, the smellier the better. (No, your old sneakers won’t do the trick!) One of the most important opossum baiting tips is to smear the bait in, on and around the trap.

HOW TO DETER POSSUMS

Chicken-wire fence is a good method to ensure you won’t find a possum in your yard. Construct a fence that is four feet high with the top 12 to 18 inches bent outward away from the garden. You can “possum-proof” standard fencing by attaching an electrically charged wire along the top. However, if you’re like most, you’d rather not detract from your landscaping. If you really want to say goodbye to a possum in your garden and in your yard, apply a liquid or granular repellent that targets their sense of smell and taste.


What Do Possums Eat and Are They Dangerous?

Opossums benefit humans in many ways, helping control a number of unwanted pests. Although opossums are nonaggressive, nocturnal creatures that generally aren’t dangerous, they are often nuisances that dig in the garbage, take up residence under a porch, raid a well-tended garden or wreak havoc in the chicken house.

Diet

Opossums are omnivores and survive by eating a variety of foods. The primary sources of sustenance are small rodents, insects, worms, slugs and snails, frogs and birds. Additionally, opossums eat vegetables, berries, nuts, fruit, garbage, pet food and bird seed.

Disease

Opossums are resistant to rabies and rarely carry the disease. Opossum feces, however, sometimes carry the eggs of a parasite that may cause illness in horses if the feces contaminate food and water. According to the Connecticut Department of Energy and Environmental Protection, most opossums don’t shed the parasite, and even if exposed, most horses don’t contact the disease. Keeping opossums away from barns and horses’ water and food is the best way to minimize opportunities for contamination. Additionally, opossums are hosts for fleas that carry a number of diseases.

Dangers to Humans and Pets

Opossums generally present no dangers to humans and animals, although they often harass household pests by showing their teeth, hissing and growling. Occasionally, fights break out and the opossums inflict serious injury with their sharp teeth. Usually, however, opossums protect themselves by emitting a foul, rotten smell from their anus while playing dead, often for as long as 45 minutes.


Keep Raccoons, Skunks, and Possums Out of Your Yard

Besides being pesky mammals, raccoons, skunks, and possums have something in common—they hate light. Keep the outside of your home well-lit, and they’ll stay way. This is also a good tip if you have a dog: Make sure you turn on the light before you let your dog out in the yard at night, and give skunks and other creatures time to amble away.

How to Keep Animals Out of Your Trash

To keep raccoons, possums, skunks, or other critters out of your garbage, regularly spray the side of your cans with a mixture of half ammonia, and half water. They hate the smell (as we all do) and will stay away. (You can also try using an ammonia-based glass cleaner like Windex, but it’s not as strong.)

Understanding The Camera Operator

THE TOP FIVE QUALITIES TO LOOK FOR WHEN HIRING A CAMERAMAN OR CREW ARE:

Once you know why you are producing a video – what your objective is – you can put together a script and storyboard with a director/producer to help you determine the best way to communicate your message. Bring the DP or cameraman in early on in the development process, so they know what you want and can discuss the available techniques.

1) Easy to work with/Flexible

Finding someone who is flexible and easy to work with is always nice to have, but it is especially true when selecting a camera operator. You want someone who can: put those being filmed at ease; be patient when working on set during unavoidable delays; and be understanding about reshooting if you’re not getting what you had envisioned. You may be able to step in and do an “okay job” at other tasks, but shooting with a $50,000 camera and lens takes technical skills learned through school and years of practice.

2) Honed technical skills/Tech savvy

Operating a camera, maintaining composition and adjusting camera angles is no easy feat. Learning, understanding and honing the technical skills required to become an operator takes many years – and then several more to hone a specialty. For instance, to be good at news requires a cameraman who is quick thinking and fast on their feet.  Others may be good at sports production and following the ball, or an expert in EFP (Electronic Field Production) which requires precise lighting and composition.  Still others specialize in multi-cam for meetings and the like, and then some can do it all.  Camera operators also need to stay up-to-date on shooting techniques, lighting, new equipment, and a plethora of formats, frame rates and resolutions.

3) Physical stamina and strength

While keeping abreast of the latest news through industry associations, forums and journals is important for honing technical skills, the camera operator must also possess physical stamina, strength and manual dexterity. Shooting, although lots of fun, can also be very demanding – with long hours, challenging conditions, and the need to be on your feet all day.

4) Creativity: they have a “good eye”

Creativity is something that cannot be taught. A good camera operator will be able to spot a good opportunity and have an artistic eye for framing shots. Having the ability to look through the lens and picture how all of the elements come together – visual composition, perspective, lighting and movement – is crucial so that the images captured will reinforce your message and tell your story in the way you want it to and one that is consistent with your brand image.

5) Attention to detail

Producing professional video is an orchestrated event that requires all parties to work together. A good camera crew will carry out instructions accurately and with precision. This level of coordination between you, camera and audio people, lighting and the rest of the crew will multiply your productivity and benefit your communication objective. Getting “what you need” or “more than you need” in the field will streamline your editing process and provide additional content for the future.


Camera Assistant: Job Description, Duties

Camera assistants setup equipment for the crew, whether in-studio or out in the field. The education is not set in stone as this is considered an entry-level job, but various postsecondary courses are available and useful to promote career advancement.

Essential Information

Camera assistants are members of technical teams that produce feature films, television programs, and Internet videos. These professionals prepare the equipment that camera operators use to shoot scenes or images. Being a camera assistant is a good way to improve work skills and gain practical experience in preparation for a career as a camera operator. Some postsecondary training is generally required, though a bachelor’s degree is recommended for those who want to advance.

Workplace

Camera assistants work in the production of television news, entertainment features, documentaries, and corporate training films. As such, they are often employed by local and national television broadcast stations, cable networks, independent film productions, and major film studios. Thus, work may be conducted both in the field, within a studio, or both. Camera assistants may also be self-employed freelancers who on a contractual basis.

Education

Aspiring camera assistants may look to vocational schools and technical institutes, as well as community colleges and four-year universities for postsecondary courses and programs in cinematography or a related field. Programs may range from seminars and workshops in camera operations to certificate and associate’s degrees in cinematography. Coursework typically covers film editing, lighting, and producing. Students in advanced courses may be required to shoot projects allowing them to hone their operating techniques.

Camera Assistant Job Duties

Camera assistants set up and position the camera equipment so that it is ready for the camera operator to use. This may include inspecting the equipment to verify that it is in good working order and loading the camera with film. Camera assistants may also position lighting equipment in preparation for shoots. Once the shoot is complete, assistants may then move equipment back to storage areas.


3 STEPS ON HOW TO BECOME A CAMERAMAN

To become a cameraman, of course you need passion for the film industry itself. But, in order to be successful in your movie production career as a cameraman, you’ll need three key elements:

  • Career training as a cameraman from film school
  • A successfully completed internship as a cameraman
  • Effective cameraman job hunting skills (Career Development skills)

STEP 1: GRADUATE FROM FILM SCHOOL

You need to learn the behind-the-camera techniques used by film industry professionals. That’s the only way you’ll be able to compete in this job market and find careers in film. Pre-production, production and post-production skills are needed to make it as a professional cameraman in today’s world. You also need to make sure that your film school is accredited so your credentials actually mean something once you graduate and start pursuing careers in film.

An accredited film and video school will teach you fundamentals of the technology behind cameras. Some of these concepts include lenses, frame rates, exposure, field depth and resolution. Your film school should teach you the science and art of visual storytelling and advanced editing techniques. You’ll also learn various other filmmaking techniques, such as writing scripts, scheduling, budgets and pitching ideas to clients.

STEP TWO: COMPLETE A CAMERAMAN INTERNSHIP

Almost all good cameraman positions, even successful entrepreneurships, will require that you complete a cameraman internship. It’s very beneficial to your field, and provides exposure to networking opportunities and the film industry itself. However, these can be hard to come by if you don’t have connections in the news, film or TV industries.

Although finding a cameraman internship is the student’s responsibility, some schools do provide assistance. A quality Digital Filmmaking and Video Production school will give its students access to campus job boards, social media pages, and Career Development advisors to assist with finding cameraman internships.

STEP THREE: FIND A CAMERAMAN JOB

Your career training at an accredited film and video school will give you the education you need to discover how to become a cameraman. Once you’ve completed your internship, you should have the on-the-job skills needed to be a cameraman for news, TV or movie productions.


Pros & Cons of Being a Cameraman

Being a cameraman is exciting, but it does have its moments of tedium. It’s a unique career choice for someone who is physical, focused and likes to be around action. Camera operators use digital equipment to capture live action for different forms of broadcasting. Having a background in photography or engineering is handy. College degrees are also helpful but not always required.

Pro: Close to the Action

Working as a cameraman can position you very close to the action. Camera operators are hired to capture live events for film or live broadcast. You could be called upon to film anything from a local flower show to a professional sports game. Cameramen see new and interesting things nearly every time they accept an assignment. You could be sitting across from a local celebrity one day and filming from the football sidelines the next. Operators are hired for jobs with conventions, news broadcasting and racing events. The field keeps you hopping and you’ll likely not have much time for just standing around.

Con: Long Work Hours

Since a cameraman is called upon to record live events, he usually works a fair share of evenings, weekends and holidays. Assignments can last over a period of days and a camera operator is usually needed to film various activities during that short period of time. When camera operators are hired for special events like weddings or graduations, they’ll work weekends too. It’s also hard to escape working holidays as many action-oriented events, like important games, happen around those times of the year as well.


Edit in Camera

Make sure your footage will cut together.

In drama this isn’t so critical because the Director will have a clear idea of what is needed and tell you all the specific shots he or she requires to create a particular sequence. In documentaries, especially stressful unpredictable situations that you have no control over, you are responsible for shooting sequences and getting all the necessary cutaway’s (pick up shots) so that the sequences you are filming cut together seamlessly.

We call this ‘editing in camera’. When filming in certain situations like war zones or riots the director relies on you, the camera operator, to get all the necessary material. In these situations everything happens so quickly that it’s simply impossible for a Director to tell you what to shoot and how to shoot it. It’s all down to you and it’s your responsibility to make sure you have all the material to make a sequence work in the edit.

Top Stainless Steel Kitchen Sink Brands To Watch For This Summer Season

How to Choose the Right Kitchen Sink

Few features in the home are used as often as the kitchen sink. And what other home item performs as many different tasks? It could be argued that the selection of a sink is one of the most important kitchen choices you will make — and it’s a decision that will affect your daily life for many years to come. We spoke to designers who belong to the National Kitchen and Bath Association (NKBA) about how to select the right sink for your kitchen.

Pros: A kitchen sink with a single, deep basin means you can easily soak or wash a big pan or prep large quantities of food.

Cons: Rinsing vegetables while soaking a large casserole dish requires a bit of juggling — as does hand washing and rinsing china or stemware.

Pros: Two basins in your kitchen sink allow you to perform separate tasks, such as cleaning dishes and preparing food, with ease. A 60/40 kitchen sink has one basin that is usually about 18 inches wide and another that is 14 inches wide. The idea is that you can clean up in the large basin and prep in the smaller one. Dual basins also come in handy when you are washing items you don’t want to put in the dishwasher (soap in one basin, rinse water in the other).

Cons: A smaller basin makes it harder to wash and soak large pans. “For clients who want flexibility, a double sink can be the way to go,” says Flatley. “There are also a number of people who are accustomed to working with two basins, and they don’t want to change.”


Tips for choosing a new kitchen sink

Here at Buster, such is our interest in the humble sink that we keep our eye on the latest trends and designs, especially those for the most used sink in the house. Here’s some important considerations when thinking about buying a new kitchen sink.

One sink

One large sink will be preferable if you are considering a farmhouse sink, as that is the style. The advantage of a large sink is that you have a lot of space to wash up and to leave that large casserole dish to soak. The downside is if you are juggling two sink-based chores at the same time  – maybe washing up and preparing food – it can be quite tricky in one sink.

Two sinks

When it comes to choosing a double-basin sink, there are several popular styles to choose from. If you have one larger sink and one small sink – the 60:40 ratio is a common standard – you should have one sink big enough to soak most pots and pans and still space to prep food. This might not be the case with two basins of equal size side-by-side.

Three sinks

There are also three-sink options, typically with two basins and a smaller sink with a garbage disposal unit. A trough sink is another type of sink that has become popular in recent times, so several people can work at it at one time. Remember, these will take up more space.

Which material works best for your needs?

Sinks are made from a range of different types of materials these days. The type you go for will depend on the overall style and look you are after – while there are also practical considerations i.e. how hard wearing and easy to clean the material is.


Choosing the Right Kitchen Sink and Faucet

Every kitchen needs a sink and faucet. When it comes to selecting these staples, style is secondary, says Max Isley, owner of Hampton Kitchens in Raleigh, N.C., and a National Kitchen and Bath Association board member.

One of the most hard-working features in a kitchen, your sink should be both functional and reflective of your kitchen’s style. Learn about various materials and styles available in kitchen sinks.

Sink Options

Kitchen sinks are typically made from stainless steel, enamel-coated cast iron, solid surfaces and composites. For clients who choose solid surface counters like granite or engineered stone, Isley recommends a stainless steel sink because of its undermount capability. Also if homeowners tend to be hard on sinks (Isley asks clients if they’re prone to throwing things into their sink), stainless is often the best choice. When shopping for a sink, keep in mind that lower-gauge stainless steel makes for a better quality sink. Some people find stainless steel sinks noisy, but that’s a problem that can be addressed by choosing a design featuring sound-absorption technology.

Once the standard in kitchen sinks, enamel-coated cast iron still has a place in today’s kitchen. “They’re probably the prettiest of all the sinks on the market today,” Isley says. However, he cautions that enamel can scratch and wear over time, which may not make this sink the best choice for people who are tough on sinks.

Faucets that Function

With the great number of faucets on the market, there is a design for everyone. “Style is strictly a personal taste issue,” Isley says. He doesn’t dictate what clients choose design-wise — people like what they like, after all — but he does guide them when it comes to function and finishes. Most faucets use cartridge, ball or ceramic disc valves. A faucet with a ceramic disk valve and solid brass base materials will be the most durable. Though many attractive faucets have two handles, Isley always pushes for single-lever faucets in the kitchen. He also suggests clients include a spray arm for filling pots with water or rinsing the sink, whether it’s part of the spout or a separate piece. Consider other convenient extras, like a garbage disposal and hot water dispenser.


Things You Should Consider Before Buying a Kitchen Sink

Choosing a brand-new kitchen sink is an investment that will completely change the look and functionality of your kitchen. To make sure you get the kitchen of your wildest Pinterest dreams, there are some factors you should consider before taking the plunge. From the right material, to the ideal size, to the big choice between an undermount or a drop-in sink, here’s everything you need to think about before buying a kitchen sink.

Consider the material.

When it comes to kitchen sinks, there are many materials to choose from: porcelain, stainless steel, cast iron, just to name a few. Be realistic about how much use the sink will get and how frequently (and thoroughly) you plan to clean it. Porcelain sinks are prone to stains and scuff marks, but don’t worry, they do come off! It just takes a little elbow grease and a cleaner that’s mildly abrasive, like baking soda.

Choose a drop-in or undermount.

What’s the difference? As the name suggests, a drop-in sink drops into the counter, so there is a visible lip that rests on the counter. Alternatively, an undermount sink attaches beneath the counter, creating a seamless look. An undermount sink, like the beautiful Elkay Lustertone Iconix Stainless Steel Sink, maximizes the available counter space, since the lip of the sink rests under the counter rather than on top. If you love a clean kitchen, this sink is for you: because there’s no lip, dirt and grime can’t get stuck between the sink and the edge of the countertop. Plus, because undermount sinks are considered a high-end option, this stylish kitchen sink could even boost your home’s resale value.

Select the right size.

There are a few questions you have to ask yourself when choosing a sink size. You want to keep budget in mind—generally, the larger the sink, the higher the price. You also need to be realistic about how much you use your sink. If you’re not an avid cook, you can probably get away with a standard size (about 22 to 33 inches long) but it’s always better to go bigger than smaller if you have the countertop space to accommodate it. Pay attention to the scale of the design as well. If you have a really tiny kitchen, a huge farmhouse-style sink risks overwhelming the entire room.

Determine if you’ll need to adjust your cabinets.

Think of your cabinets as the foundation for your sink. Depending on what you’re working with already, you have to choose your style carefully, unless you’re doing a complete renovation. The biggest considerations: make sure the cabinets you have can accommodate the depth of your new sink and that they can support the weight of the new sink. For example, a porcelain farmhouse sink that’s filled with water can easily weigh over 100 pounds—the cabinetry has to be able to withstand that.


How to Choose a Kitchen Sink

Your kitchen sink is probably not the place where you’d choose to spend your time, but it’s a necessity—and having the right one can make all those minutes spent scrubbing and rinsing easier and more efficient. Learn about the different materials, types of sinks, and factors to consider as you discover how to select a kitchen sink that fits your needs.

Types of Kitchen Sinks: Materials

Kitchen sinks come in many different materials, including metal and stone. The best kitchen sink material for you depends on how much money you want to spend, your cleaning routine preferences, and what material goes best with your kitchen’s style.

Stainless-steel kitchen sinks are one of the most popular options and the material continues to be improved and upgraded. The newer 16- and 18-gauge sinks are thicker and less noisy than their less-expensive predecessors. Stainless-steel sinks contain a percentage of chromium and nickel, which is indicated by numbers such as 18/10 (18 percent chromium and 10 percent nickel). The metal imparts a rich glow and adds corrosion resistance. Finishes range from a mirrorlike shine to a satin luster. Stainless-steel kitchen sinks are appealing because they are affordable, durable, and easy to clean. However, they can become scratched and water spots can become an issue, and the cheaper sinks can sometimes make more noise when items are dropped in.

Cast-iron kitchen sinks are made from a sturdy material that is enamel fired on an iron form. These durable sinks lessen noise and vibration more than other materials but can be heavy for installation. An added advantage is that cast-iron sinks are available in a wide range of colors.

Composite sinks can be made of quartz, granite, or other materials mixed with an acrylic- or polyester-resin base. They usually feature speckled color, resistance to stains and scratches, and easy care. However, they can be expensive.