Simple Touch Up Solutions For Your Damaged Interior Painting

How to Increase Property Value by Using Paint

For most homeowners, making improvements is an important part of owning their own place. Not only will this make the house more comfortable to live in, but for most, it will also increase the overall value. While many changes can be made, some can be quite expensive and require weeks to months of labor by professionals. If you’re looking for an easy update, then try painting your home. This is an easy and affordable way to increase the overall value while improving the beauty of your residence.

To increase property value using paint, the tips below can help. You might be surprised that it’s one of the easiest ways to truly improve your home and make it better than ever. Even if you don’t plan on selling right away, fresh paint can make all the difference with your love for your home.

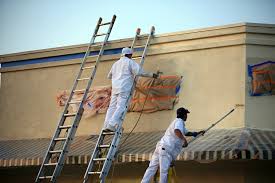
Start with the Outside

Curb appeal is one of the most important factors in selling a home and making it look desirable to potential buyers. If your paint is chipped, faded, or a bright color, then you’ll want to have it painted right away. In most areas, neutral colors with coordinating trim are by far the most attractive. This can include gray, beige, brown, white, navy blue, and white.

While it can be tempting to try to save money and paint on your own, this is not recommended. Instead, it’s best to hire professional Painters to ensure the painting is done the right way. With our expertise, you’ll have peace of mind knowing the paint will look beautiful once it’s done. Better yet, having professionals is a much safer choice because they come equipped with experience and safety equipment.
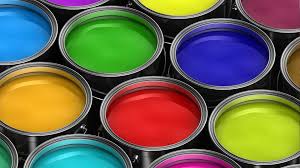
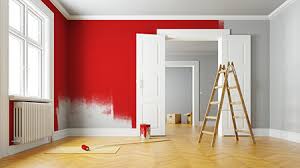
Try New Colors

The interior paint colors in your home don’t have to be boring stark white. In fact, many buyers don’t want plain white walls when they look at homes to purchase. While neutral colors are the most aesthetically pleasing, you can have Painters add in accent walls with bold colors for a more customized look. Some of the best colors to use are soft blues, gray, beige, or off-white. Beautiful complimentary paint colors will immediately make the look of your home more modern, welcoming and can even increase resale value if you’re looking to sell.


Paint the Trim

If the paint on your home’s trim doesn’t look nice, it can take away from the overall look of your newly painted walls. To avoid this, have the trim carefully painted by a professional with attention to detail. This should be done on the exterior trim around the windows and interior baseboards on the walls throughout the home. Although this can be painstaking work, it’s well worth it for the improved look it can offer.

Update the Bathroom

Over time, the paint inside of your bathroom can become discolored with water, soap, and toothpaste stains. Fortunately, you can cover these up by applying a fresh coat of paint within the space. Bathrooms should generally be painted white, creamy white, light blue, or any other light color that will make space look bigger and brighter. However, charcoal or brown can be used if there are a lot of white accents, such as white-trimmed mirrors and a white vanity.


Paint the Shutters

Installing new shutters in your home can cost thousands of dollars, which is easily out of budget for many homeowners. Fortunately, you can transform the look of older shutters by having them painted by a professional. This will make them look fresh and brand new so your entire space looks lighter and brighter. In most homes, white is the best color to go with when it comes to these window coverings. It will match any paint color on the walls and look great from the outside as well.

Update the Front Door

Your front door can be a welcoming accent piece that adds a unique and fun touch to the look of your home. Try going with a color that pairs well with the exterior paint colors used in your home. This can include blue, red, or even black. Although this may seem bold, it can improve your home’s appearance and give it a more customized look.


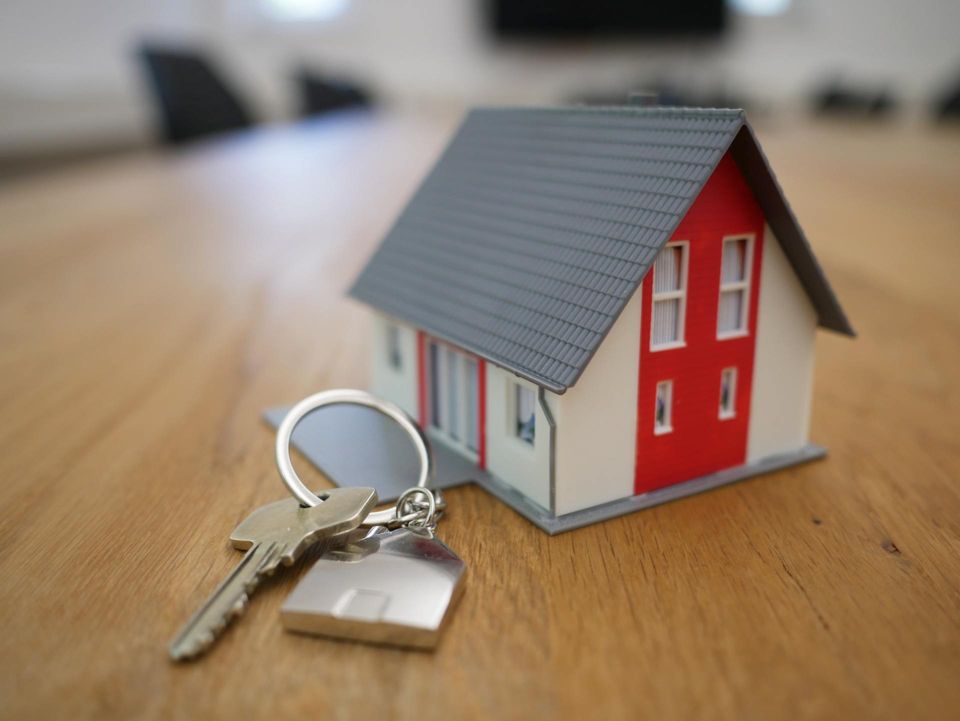
Professional house painting can increase your property value

Your home is your most prized possession and it is likely to be your biggest investment. Increasing the value of your home is an obvious choice for many people. Instead of making costly renovations (such as remodelling, building a new garage or building a pool in your backyard), why not opt for a less expensive, yet equally appealing upgrade – such as professional house painting? Whether you are planning to sell your home in the near future or stay in it for another few years, a professional paint job will increase the value of your home.

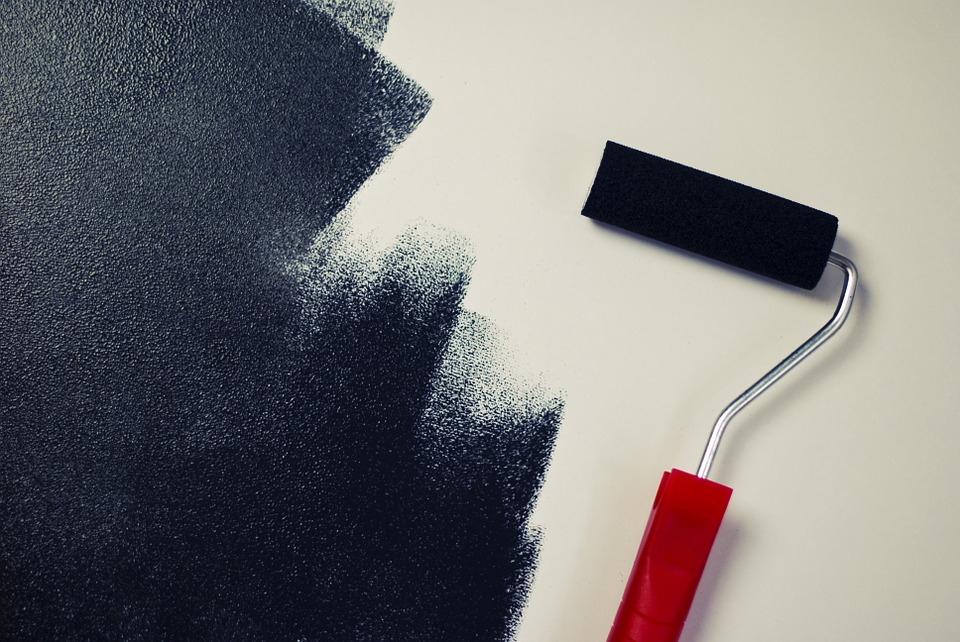
What is the condition of your paint?

The look and feel of a residence is widely influenced by the paint job. Is the paint fresh, vibrant and new? Or is the paint old and cracking? Your home’s paint will deteriorate over time due to weather, smudges and everyday use. Not only will a fresh coat of paint affect the perceptions of outside visitors (such as valuators and potential buyers), but it will also influence how you and your family feel when entering your home. Some of the benefits of hiring a professional painter include the following:

You can live in your home while it is being painted. If you are working a full-time job, you will probably have to stretch the paint job over a few weekends in order to get the job done. Hiring a professional painter relieves you of these duties, as they can take care of the painting while you are at work and get the job done in the minimum amount of time.

Eliminate errors. Not every person has all the correct tools and equipment needed to pull off a professional paint job. Reduce the amount of inconsistencies and errors by hiring a team of professionals that do professional house painting on a daily basis.


Proven Ways to Increase Home Value

Making your house more efficient, adding square footage, upgrading the kitchen or bath and installing smart-home technology can help increase its value.

Make it more attractive

Curb appeal — how your home looks from the street — is your first chance to make a good impression, A home’s exterior needs to make a prospective buyer want to walk through the front door.

Make sure existing landscaping is well-maintained. If your yard seems dull in comparison with your neighbors, consider planting flowers or repainting the front door.

Once the exterior looks good, focus on the kitchen and bathroom. When these two rooms are outdated, they can keep a property from reaching its highest valuation, And you don’t have to spring for heated towel racks or marble floors, either. A minor kitchen remodel recoups 81% of its cost in added value on average, versus 53% for an upscale kitchen remodel with stone countertops, custom cabinets and commercial-grade appliances, according to Remodeling magazine’s “2018 Cost vs. Value Report.”

The same is true for bathrooms; a midrange remodel — new flooring and a few updated fixtures — delivers a 70% return on investment, while an upscale bathroom remodel — heated flooring, custom cabinets and designer fixtures — sees 56% on average.

Make it low-maintenance

Since many home buyers worry about buying a home that will need constant maintenance, replacing a major component before putting it up for sale — like the furnace, water heater or even the roof — may calm fears of an emergency repair in the near future and help get you a higher price.

Improvements that make things easy to clean and maintain may also increase home value. Consider replacing easily stained carpet with hardwood floors or replace high-maintenance wood siding with vinyl siding.

Make it bigger

“Square footage has a huge impact on value,” Price per square foot is one way she helps clients compare homes that are similar in style and upgrades.

Bigger homes often command higher values, and even if an appraiser doesn’t officially acknowledge the full value of added space, a buyer will likely notice.

Adding a room is the obvious way to make your house bigger, but you can also create additional living space by finishing the basement or building a deck.

Hunter Ceiling Fans Advice

ULTRA GUIDE OF CHOOSING BEST CEILING FANS FOR HOME

They are quite useful for many reasons, and they even look nice hanging from the ceiling. You can find them in many different looks to match any decorating style you may have. They come in different colors, different options, and different sizes, allowing you to find the perfect option for any area where you want to improve air circulation.

Where Can You Install A Ceiling Fan?

Ceiling fans can be installed in just about every room inside and outside of your home. While they work the same in every space, the advantages in specific rooms are a little different.

You can place them in bedrooms to keep a nice temperature while you sleep and spend time in the space. Some people even appreciate the sound of a ceiling fan as they sleep. You can also install ceiling fans in your bathroom. This is a good option when you want to circulate the air in this room as it can help the moisture when it builds up and the smells that occur here.

Hectic life and taste

Installing a ceiling fan can not only make your home more comfortable but can also add to its charm and character. This is particularly true if you choose an attractive fan that is a good match for the rest of your decor

Fasten air circulation

Ceiling fans can improve air circulation. As technology improves nearly every day, more and more new options are introduced. For most year-round use ceiling fans, it can keep you cool in the summer and warm in the winter. They can also help you cut down on heating and cooling costs.


Ceiling Fans Buying Guide

The ceiling fan— a child of the Industrial Revolution—is still one of the most sensible solutions to home comfort despite a virtual revolution in the world of home comfort appliances. After more than a century, ceiling fans continue to be a simple but charming supplement to home cooling and heating.

Why this lasting popularity? Certainly charm is a factor. For some people, the steady, quiet whirl of the paddles evokes the romance of bygone days and sultry summer afternoons. More important is the fan’s practical side. It makes a room more comfortable and lowers energy bills. By forcing warm air downward in the winter and stirring up breezes in the summer, it decreases demands on heating and air-conditioning systems. And yet it operates on just pennies a day.

During the summer, using a ceiling fan in conjunction with an air conditioner will allow you to set the thermostat higher without a noticeable difference in comfort. A fan’s breeze will make a 79-degree room feel more like 72 degrees. By raising the thermostat, you can save up to 30% on your air-conditioning bills, depending on your home’s construction and where you live.

Ceiling Fan Controls

Most fans are mounted at a ceiling box where a light fixture was formerly located. Typically, the light switch is replaced with a control that allows various fan speeds and—if the fan includes lights—light settings. It’s important for this control to have a capacitor design and be made by the same manufacturer as the fan to eliminate buzz and hum.

Fan Blade Sizes & Materials

Fans have from three to five blades; the traditional number is four. The number of blades does not affect performance much. Some say that more blades actually move less air because there is less space for them to grab air. But the number of blades does tend to affect cost. Generally speaking, the more blades the higher the cost


a guide to choosing the right one

The ceiling fan is one of those household essentials in which form and function can be perfectly married. The latest styles range from graceful good looks to fabulous statement-makers, and they’re useful year-round to help keep you cooler in summer and warmer in winter. Here’s what you need to know.

SIZE MATTERS

When it comes to ceiling fans, size is actually everything. “A small fan in a large room will have to work twice as hard to cool you off, while a large fan in a small room may create an uncomfortable amount of airflow,” says Beacon Lighting’s Denise Hammond. For a small to medium-sized room up to 4m x 5m, select a fan with 122cm blades, suggests Denise, while blades of 132cm-plus will suit a room size of up to 6m x 6m. In a large, open-plan space, you may need two or more models

It’s less the number of blades than the shape of the aerofoil that truly determines the effectiveness of the fan, explains Sarah Johnston of Big Ass Fans. “Our aerofoil design includes an upswept blade angle, that has been designed to provide greater air flow and therefore more effective coverage of a room in comparison to traditional ceiling fans,” she says

PERFECT POSITIONING

“Blades need to be at least 2.1m from the floor,” says builder Patrick Toner of All Things Building, so if you have low or standard 2.4m ceilings you’ll need to look for a low-profile model that can be fitted flush to the ceiling. “Most fans come with a ball canopy fixing method, which means fans can be mounted on sloping, vaulted or flat ceilings,” explains Denise. For high or raked ceilings, an extension rod might be necessary to actually bring the fan down to an efficient height

In a small room with one fan, centering it is logical for both aesthetics and efficiency. However in a large bedroom, it might make better sense to position it over the bed for relief on hot nights. In an expansive, open-plan room, consider using fans to ‘zone’ spaces, such as placing one over your sitting area and one above the dining table. Be aware that fans need to be fitted securely to joists or blocking, and should be positioned away from downlights to prevent flickering. “There’s no hard and fast rule for this distance,” says Patrick. “It depends on how far the fan is from the ceiling and the angle of light from your downlights. Ask your builder and electrician for advice.”


Ceiling Fan Buying Guide

Choose the Right Ceiling Fan for Your Space

A ceiling fan’s primary purpose is to circulate air in a room. Air conditioners chill air, but ceiling fans push it around, which means they’re useful for both cooling and heating. In a bedroom, a ceiling fan encourages restful sleep without running the air conditioning. On an open or screened porch, a ceiling fan can create a refreshing retreat — just be sure it’s rated for damp or wet locations. Look for outdoor fans with weatherproof fan blades, too. Both types can handle moisture, but damp-rated fans shouldn’t come in contact with water. Wet-rated fans are suitable for coastal or rainy areas.

Ceiling Height

When selecting a new or a replacement ceiling fan, keep in mind the ceiling height. The ideal fan height from floor to fan blades is approximately 8 feet. Many fans have multiple mounting options, allowing them to work almost anywhere in the home. Measure the height of your ceiling to determine the mounting option that’ll work best for your space

Mounting Options

Flush Mount: Made for rooms with low ceilings where a low profile is wanted or required. These ceiling fans are mounted flush to the ceiling, with no extra attachment.

Ceiling Fan Blades

The look of a ceiling fan’s blades are actually more of a design feature than a matter of efficiency or utility. The fan’s ability to move air is determined by the pitch of the blades, so pick the one you like the look of best. Many fans come with reversible blades so if you get tired of one finish, you can reverse them later. Talk about an effortless design update. The number of blades and blade shapes are also getting a makeover. Some fans have as many as nine blades, for a helicopter style; however, the traditional four- to five-blade ceiling fans remain classic.

Ceiling Fan Direction in Summer and Winter

Change the ceiling fan direction to make it more comfortable year-round, and save energy and money by adjusting your thermostat. In the summer, set the fan blades to revolve in a counterclockwise direction as you look up at it to create a downward motion and a cooling effect. Doing this also raises the thermostat temperature, which will reduce your air conditioner’s workload.


Things To Know Before Buying a Ceiling Fan

Energy Savings

Ceiling Fans are great for improving room comfort while at the same time producing energy and cost savings. Homeowners are experiencing higher energy costs and it’s only going to get worse. There has never been a better time than now to consider the purchase of a ceiling fan(s)and to enjoy both the aesthetic as well as energy saving benefits of owning a ceiling fan. In summer ceiling fans allow you to feel cool without having to turn the air conditioning full-on therefore saving energy and money. Setting your thermostat higher with a ceiling fan running can save up to 40% on air conditioning bills. Studies show this can make a room feel up to seven degrees cooler. In winter ceiling fans should be reversed and used to push the warm air down from the ceiling to keep the heat in the lower part of the room. This is especially important in rooms with tall ceilings, resulting in energy and money savings from recirculating the warm air allowing one to set the thermostat lower.

Larger Rooms Need Bigger Fans

For maximum performance, choose the right fan to fit your room size. In a room up to 50 square feet, like a bathroom, choose a 29″ fan. Breakfast nooks and laundry rooms up to 75 Sq. ft. choose a 36″ blade span. Medium size rooms up too 100 square feet can fit fans from 36″ to 42″. Standard bedrooms and family rooms up to 400 square feet work most efficiently with fans that are 50″ or 52″. Great rooms or large areas over 400 sq. ft. require a ceiling fan with a 54″ or larger blade span. For long or large rooms, you should consider more than one fan to handle your cooling requirements. For maximum comfort, the fan should be placed as close to the center of the room as possible. Keep blade tips at least 18 inches from any wall. Ceilings Lower Than Eight Feet. Use the Ceiling Mounting Kit or go with a Snugger or Hugger model to achieve the desired seven-foot blade clearance.  For ceilings above eight feet, the fan should be hung by a downrod extension so that the fan is eight or nine feet from the floor. You will want to hang it at this level since the higher the fan is hung above eight feet, the less air circulates near the floor.

Bathroom and Outdoor Ceiling Fans

Look for a bathroom ceiling fan specifically designed and UL-listed for damp locations. Bathroom Ceiling Fans start at 29 inch blade spans since smaller rooms require less air movement and space is usually limited. Want one for the covered outdoor patio? Opt for an Outdoor Ceiling Fan that this is UL-listed for wet locations. Outdoor ceiling fans can also be used indoors. They have protective motor coverings to keep moisture from corroding the motor

Fan Blade Pitch and Size

Fan blades determine the amount of air being circulated throughout the room. Fan blade pitch is usually between a 12-15 degree angle for optimal circulation. Fan blades must be weighted and matched as a balanced set to avoid having your fan wobble. Ceiling fans with less than a 12 degree angle will not circulate air as well and be less efficient. The greater the angle or higher the pitch of the blade the more air circulation you will have in your room.

The Motor

The motor is responsible for producing quiet operation while driving the blades for air movement. Look for high-quality motors with heavy-duty windings and sealed bearings that are permanently lubricated. Smaller, less powerful motors found on lower quality fans may produce higher operating temperatures, lower air circulation and noisier operation. Motors are designed to work flawlessly for long periods of time and should have a long lasting life

The Best Tips To Make Commercial Painting

COMMERCIAL INTERIOR PAINTING TIPS

Painting your business all by yourself is a tough job and the work done can never be compared to getting it painted by a professional. They have years of experience and know various tips and tricks to do the job better.

These professionals follow a three step process:

  • Prep
  • Prime
  • Paint

PREP

  • Cover the Floor Edges with a Tape
    Use blue painter’s tape and cover the floor edges with it while smoothing it with a putty knife. This will secure the tape closely to the edge and the paint will not bleed underneath the tape. Avoid using masking tape as it leaves a sticky residue behind, which is hard to scrape.
  • Lay Drop Cloths
    A canvas sheet makes the best drop cloth as it easily absorbs the paint and does not let it bleed to the ground. Avoid using plastic sheets as paint can easily slip off of it.
  • Tape Fixtures
    Cover the bulbs with plastic bags and tape them. As for any old water stains, spray the areas with a stain killer.

PRIME

  • Sanding
    Use a sanding sponge to roughen the hard and smooth surfaces. Sanding also removes all the bumps form the previous paint job so that the new coating is applied smoothly. The roughened surfaces help the paint adhere better.
  • Fill the Dents and Cracks
    Instead of using tape to fill the cracks, use plaster of Paris or painter putty. These two materials stick faster than tape.
  • Caulk the Cracks
    Use caulk to seal the gaps between the doors to have a clean finish. Instead of using the caulk directly, buy a caulk gun with a thin nozzle so that you can stick the nozzle in the gaps.
  • Use a Primer
    A primer is a diluted alcohol paint solution that covers all the bad marks. It helps the paint to bond with the wall.

PAINT

  • Roller Rules
    Use a nine inch roller for painting the walls. A roller size bigger than this will be hard to handle and may create stray lines due to a wobbly hand. Before you start painting, wash your roller in the dish washing liquid to get rid of the excess fibers.
  • Buy Glossy Paints
    Compared to flat paints, glossy paints are stain resistant and require less maintenance. The walls can be cleaned easily with a sponge due to their slippery surface.

Tip #3: Buy Paint Extender
Professionals apply at least two paint coats on every wall. A paint extender dries slower so you get more time to apply the second paint coat without any ugly lap marks.

Tip #4: Use a Scraper
The key to smooth lines is to finish one wall and then scrape the corners with a screw driver. This will give you a line where the roller cannot reach and you can finish the corners with a paint brush.


Commercial Painting Tips: Interior Painters, Colors and the Work Place

Remarkable commercial painting tips relate to the colors of the surface walls in the office or the work place. For most of us, painting walls is a usual task that commercial painters (particularly the interior painters) do. There is the corresponding or selected color applied. Unknowingly, it triggers a vibe. The color has an effect on the performance of the employees. The effect is for all in the work place. This includes skilled (or blue-collared) workers as well as executive and administrative (or white-collared) workers.

There are various colors and hues that create a distinctive and positive atmosphere in the office and the work. The color is selected from the type of work place, too

  • Blue is associated to the serenity of the ocean: It is classified one of the cool colors
  • Blue tends to reduce stress at work
  • Green typically prompts for tranquility amidst chaos: It is another cool color
  • Green boosts a positive conduct
  • Amazingly, green also helps minimize eye strain for someone staring at the wall of this color
  • Red initiates excitement in an amiable environment: It is grouped to be among warm colors
  • Red stimulates action on the tasks that need to be done


Choose the Right Colors

While you want your business to catch the eye of potential customers, be careful to select colors that will attract attention without being overpowering. Having one bold-accent wall can really make a statement, but remember: less is more when it comes to very bright colors. By selecting a calm color palette, you can avoid overwhelming your customers. Adding bold color through pictures, pillows, and other small elements are temporary and less expensive ways to add a pop of color.


Planning and Budget

Knowing your available resources and creating a solid budget for your painting project can provide clarity between you and your contractor. Your budget needs to be realistic and based on both your goals and how much you can afford to spend. Additionally, it’s important to consider the cost of doing the job during work hours or after hours, since after hours can be costlier, while disrupting business operations could affect your long-term productivity as well. A skilled and experienced contractor will help you plan the best strategy for completing the job with the most convenient schedule and efficient manner for your business operation. They know what issues can arise and how to avoid or address them quickly and effectively.


Factors When Choosing a Commercial Painting Company

The price isn’t the only thing you should look at when choosing a reputable commercial painting company. You should also look at the following information, which you can get by asking.

Experience

The contractor should at least have a few years under his belt for you to ensure that he knows what he’s doing. Contractors who have been in the industry for a while will already have seen most of the problems. If they encounter a problem, they’ll know how to handle it.

This is more important if your project has high stakes. However, we also don’t mean you shouldn’t give the newcomers a chance. If the risks are low and a new contractor has already collected good reviews, why not hire them for a lower price?

License and Certifications

The contractor also has to have the proper license and certifications to operate. Ask for these thing

First to make sure you’re dealing with a legal business.

The painting company must have general liability insurance and workers’ compensation insurance. These protect their employees should something happen to them while working inside your property.

A reputable company has no problem showing you the documents to prove they have these things.

Guarantee

What type of guarantee do they provide? They should offer some sort of hassle-free guarantee. You can cash this in if you find a problem with their workmanship after the project.

Most will have a warranty, but that doesn’t mean claiming it won’t be a headache. It depends on their professionalism and customer service.