Use The Best Loading Services For Your Expedition

What Types Of Services And Loading Methods Do Freight Forwarding Companies Offer?

What is a freight forwarder? Freight forwarders are responsible for transporting goods between two destinations. Freight forwarding companies arrange the whole process for their shippers, from storing the goods to shipping them internationally. Freight forwarders are intermediaries between the shippers and transportation services, negotiating with a range of carriers in order to achieve the most economical, reliable and fastest route.


Types of Freight Forwarding Services

There are different modes or types of freight forwarding services that cater to varied transporting or shipping needs.

Ground Freight Shipping

Also dubbed as door-to-door shipping, this is typically used for local transporting of goods. Trucks are used for loading and unloading cargo locally or from one state to another.  Around 26 pallets can be loaded into a standard size truck.

This is an affordable option but could be costly too depending on traffic, road hazards, and infrastructure problems.

Rail Freight Shipping

If you are a bit low on the budget, you might want to consider this eco-friendly option. This is said to be a faster and more economical option for freight shipping.

This is a safe and also cost-efficient way to move cargos as it’s free from any traffic or roadblocks. It can do both domestic and international shipping.

Sea Freight Shipping

Used mostly for shipping overseas, this mode of freight shipping makes use of ferries and ships for transporting cargos.

It’s the classic and oldest form of ship freight for both domestic and international shipping of large containers. The only downside is that this could be slower than other forms. But, is one of the cheapest modes available to move goods and products.

Air Freight Shipping

If you want to move your cargo fast then this is the best route to do it. Airfreight services make use of cargo planes which is ideal for packages that have a weight of more than 100 pounds.

This may be considered as a top-dollar option or rather pricey but this is the safest and quickest way to transport your cargo for both domestic and international shipping.


Why should I use a freight forwarder?

A freight forwarder is not required for importing or exporting goods. However, because importing and exporting can involve so much documentation and so many regulations, and these regulations and the required documentation can vary from country to country, many of the most successful importers and exporters use a commercial freight forwarder to be their logistics partner.

There are many advantages to using a freight forwarder. Here are a few listed:

  • A Freight Forwarder handles ancillary services that are part of the international shipping business
    • Insurance
    • Customs Documentation
    • etc…
  • A Freight Forwarder provides to consolidators as well as individual shippers:
    • Non-Vessel Operating Common Carrier documentation
    • Bills of Lading
    • Warehousing
    • Risk Assessment and Management
    • Methods of International Payment
    • etc…
  • A Freight Forwarder insists on personal communication and great customer service.


Benefits offered by a Professional Freight Forwarding Company

Freight forwarders assist on all levels of the shipping process, from the packing and storing stages, up to and including the intensive customs procedure. While forwarders do not physically move goods themselves, they are experts in the logistics of getting the goods in question from point A to point B, anticipating and avoiding any unnecessary pitfalls along the way.

Here are some of the major benefits offered by a professional freight forwarder:

  • Successful, experienced freight forwarding companies will offer a strong network of business contacts. This will help you to get the best rates for your individual shipping project, and ensure that your goods arrive safely and securely in a timely manner.
  • Freight forwarders maintain a professional level of personal communication and customer service—they not only want your business, they want to maintain the professional relationship in the long-term too. It is in your best interest to maintain an open and honest working relationship. Your forwarder is responsible for handling your precious cargo: make sure that you choose a company you can trust, preferably one with great customer service and an established reputation within the industry.
  • In addition to the basic service of shipping, freight forwarders can assist with other aspects of the process, including: packaging, storage, insurance, inventory management and import/export documentation. Note: additional services may not be included in your original quote, so be sure to inquire. If extras are not required for your first project, it is always good to know for future reference.


Customs Broker

A customs broker is a service, in the form of an individual or a firm, that is able to process different kinds of shipment through customs in the most efficient fashion. These brokers make sure that goods would be provided with the necessary documents and clearances in order for the transporting process to proceed smoothly. This means that they have to adhere to various rules and regulations from a number of different countries — a challenging feat without the right skills and documentation. From government regulations to international tax laws, a customs broker has the ability to smoothen out the delivery process and save more time overall.

Tips To Do House Cleaning

Reasons Why House Cleaning Is So Essential

A clean home is like heaven and it is always welcoming to come to a clean house. It takes a lot of effort to maintain and keep your house clean but it has its own advantages and perks. If you clean regularly and effectively, your house as it will always look as good as new. Hygienically it is important to live in a clean house.

The feeling that you get when you walk into a clean home is just one of calmness and relaxation. Going home at the end of a very long day into a house that’s neat and clean will allow it to feel as a place of refuge. If your home is cluttered and messy it makes your life feel much more comfy and unorganized. It’s essential that you emotionally in addition to physically to get your home cleaned.


Below are some few reasons that, why it is important to have a clean home as follows:

  • You can sleep better

There is nothing more relaxing than jumping in a bed with clean sheets and saying good night to an orderly house. You can rest at ease when you’re not waking up to chaos.

  • It is good for children

It is not good for humans of any age to live in filth, but especially children. Young children of crawling age can pick up anything on the floor and put it in their mouth.

Children are also susceptible to bacteria, molds, and mildews that can also affect your health. Keeping your house clean and sanitized that can keep your children and your whole family healthier. In the case of children family members should be much aware of the importance of regular home cleaning.

  • You Can Find Things

Lost your keys or cell phone again? With a clean home, you’ll spend less time looking for things you’ve misplaced. Simplify your life by going through the mail when you receive it and getting rid of unneeded papers or household items when you don’t need them. You’ll feel better when your home is organized and you’ll find what you need in its rightful place.

  • You’ll Be More Creative

Clean space allows the mind to relax and be more creative. When you’re surrounded by uncleanliness or a disorganized mess, your mind focuses more on the chaos and less on letting your creative juices flow. If you’re a creative person, keeping a clean home will help you do what you do best.


Health benefits of a clean home

The question remains: do fit people have more energy to clean their homes, or are they simply disciplined in terms of their fitness and house cleanliness? Regardless, keeping a clean home has its benefits – a potentially fit body being just one.

Other reasons to keep a clean home include:

  • Lowering stress and fatigue
  • Reducing allergy and asthma symptoms
  • Improving safety
  • Lessening the spread of germs
  • Keeping pests away
  • Improving your diet and waistline


TIPS FOR CHOOSING A PROFESSIONAL HOUSE CLEANING COMPANY

When choosing a reputable cleaning firm, your choice should not be dictated by the cost quoted. According to cleaning service, you do not want to hire a service provider that will damage your property and disappear. This is something that has happened to many homeowners. To make the right decision, there are many factors to consider. The following are some of the factors.

  1. Status of the Firm

You should ask yourself whether the cleaning company you want to hire is established or not. This is because you do not want to hire a company that you cannot track if something goes wrong. How can you determine that the company you choose is experienced and established? You can determine this from the way they communicate, the quality guarantees, and the cost they offer. If you find a company is not well-established, you should move to the next one.

  1. Services Offered

An established cleaning company will offer a wide range of cleaning services. They can offer services from residential to commercial cleaning to sanitation services. If you find a company that shies away from hard and time-consuming tasks, there is a serious problem. In that case, you should be cautious when hiring them.

  1. Trained Staff

You do not want to hire someone who is not trained. This is because the staff will handle your most important assets. You do not want them to damage your items because of lack of knowledge. Also, you need maids that understand the various good cleaning practices. Therefore, before you choose a cleaning company, you should ask whether their maids are cleaning. If they are not hired, you should move on onto another company.

  1. Certifications

You need a reputable company that has certifications and adheres to the right cleaning standards. Usually, an established company will follow certain principles and standards to ensure it provides high-quality services. In addition, you should visit their offices to check the different certificates they have. A reputable firm will display such certificates in their offices.

  1. Green Cleaning

Nowadays, a lot of companies have adopted green cleaning practices. Therefore, you should hire a firm that uses products and procedures that are environmental-friendly. Ensure you ask the firm about the cleaning practices they have adopted. Check whether they are using harsh products that can damage your property and also put you at health risk. It is a good idea to carry out extensive research about the cleaning methods used by the company.

  1. Accommodate Your Needs

You should choose a company that is willing to accommodate your requirements. Ideally, it should tailor its services to meet your needs. Remember that different homeowners have different needs depending on your wants and preferences. If a company in consideration is not ready to adapt to your needs, then you should not hire it. Ensure you choose a company that can follow your guidelines and instructions.


Accommodate Your Needs

You should choose a company that is willing to accommodate your requirements. Ideally, it should tailor its services to meet your needs. Remember that different homeowners have different needs depending on your wants and preferences. If a company in consideration is not ready to adapt to your needs, then you should not hire it. Ensure you choose a company that can follow your guidelines and instructions.

The Best Way To Make Kitchen Remodelling

Kitchen Remodeling Tips

Eliminate Wasted Steps

Think about how and where you use kitchen items. Store breakfast foods and bowls near the breakfast table. Keep wraps and plastic containers in one handy spot near a work surface for wrapping leftovers. Locate dishware and flatware near the dishwasher to ease the process of unloading.

Design Wide Walkways

Paths throughout a kitchen should be at least 36 inches wide. Paths within the cooking zone should be 42 inches wide for a one-cook kitchen and 48 inches wide for a two-cook configuration. When planning, adjust kitchen islands and peninsulas accordingly.

Direct Traffic

For kid-friendly kitchen designs, keep the cooktop out of traffic areas so children don’t catch handles and cause spills when running through. Also, make the refrigerator accessible to both passersby and people working in cooking and cleanup areas.

Find the Right Height for the Microwave

The best height and location for a microwave oven depends on the chef and the degree of kid-friendliness desired in the kitchen. For adults, 15 inches above countertop level is a good microwave height. For kids, a below-countertop setup might be safer and more suitable.

Stay Clear of Corners

To make cabinet and appliance doors fully functional, plan space for the door’s clearance and swing direction in your kitchen design. Keep appliances away from corners, and make sure doors won’t bang into each other if open at the same time.


Tips To Avoid Getting Burned By Kitchen Remodels

Don’t Overspend

Before you start planning, consider the market and decide whether a low-, medium-, or high-end kitchen remodel makes the most sense. Costs can run the gamut from $2,000 for a simple paint-and-hardware upgrade to $50,000 if you’re installing expensive countertops and luxury appliances.

Avoid An Identity Crisis

Don’t try to remodel a 50’s ranch-style kitchen into a contemporary cook space.All homes, however humble, are built in a certain architectural style. Work with it, not against it. You’ll be spending too much money and time on complete overhaul, and you’ll end up with a kitchen that looks like it belongs in someone else’s home.

Don’t Lose Track Of Trends

There’s always something new in the world of kitchen improvement. By staying on top of the latest technological trends and improvements, you may be able to find less expensive, more eco-friendly versions of the hottest looks.

Keep The Plumbing Where It Is

Moving water and gas lines to accommodate the reconfiguration of sinks, ovens, stoves, or dishwashers is extremely costly, especially in older homes. Keep any pipe-connected elements where they are, and keep some extra cash in your pocket.

Watch For The Wrong Floor Plan

If you do have the budget to rearrange appliances, make sure to keep your floor plan in mind. Does it follow the natural triangular traffic pattern between the refrigerator, stove, and oven? Is the dishwasher next to the sink? It should be, because otherwise, you create a mess every time you walk across the room with a dripping dish in your hand. To save money, I once put a dishwasher in the counter opposite the sink – and as a result, I cleaned up drips on the floor for years.


Smart Strategies for Kitchen Remodeling

Plan, Plan, Plan

Planning your kitchen remodel should take more time than the actual construction. If you plan well, the amount of time you’re inconvenienced by construction mayhem will be minimized. Plus, you’re more likely to stay on budget.

Get Real About Appliances

It’s easy to get carried away when planning your new kitchen. A six-burner commercial-grade range and luxury-brand refrigerator may make eye-catching centerpieces, but they may not fit your cooking needs or lifestyle.

Keep the Same Footprint

Nothing will drive up the cost of a remodel faster than changing the location of plumbing pipes and electrical outlets, and knocking down walls. This is usually where unforeseen problems occur.

Don’t Underestimate the Power of Lighting

Lighting can make a world of difference in a kitchen. It can make it look larger and brighter. And it will help you work safely and efficiently. You should have two different types of lighting in your kitchen.

Be Quality-Conscious

Functionality and durability should be top priorities during kitchen remodeling. Resist low-quality bargains, and choose products that combine low maintenance with long warranty periods. Solid-surface countertops, for instance, may cost a little more, but with the proper care, they’ll look great for a long time.


What I Wish I Knew Before My DIY Kitchen Remodel

Pick your appliances before doing anything else.

When we planned our kitchen, we slotted in small-to-average-size appliances, but we didn’t know exactly what we wanted. Big mistake. Three months into this project, I became obsessed with a refrigerator—one that wouldn’t fit into the space. Trying to notch in the right appliances after the fact is like a frustrating game of Tetris.

Save money on your cabinets.

Speaking of layout, we knew we wanted the famous kitchen triangle—easy flow among stove, sink and refrigerator. We also knew that if we brought our measurements to Home Depot, the store would draw out our kitchen for free, dropping in cabinet dimensions, advising us on island height and sending us away with a blueprint. What we didn’t know, though, is that we didn’t have to actually buy our cabinets at Home Depot—easily the most expensive element of the project, though there was a sale running at the time.

Let the pros do the most important things.

When we couldn’t get an appointment with an electrician for a month, Rob thought he’d save time and money by wiring the kitchen himself. But hanging new lights, adding a dishwasher in our island and rewiring old outlets took him weeks, with several inspections in between. A pro would have been faster.

Remember that some elements will require a lot of advance notice.

We heeded Kelly’s advice and had our cabinets professionally installed—mess that up, she warned, and you screw up your countertops and backsplash, too. And although our windows were professionally installed as well, I wish I’d known beforehand that windows take six weeks to fabricate. Looking back, I should have ordered them before we did the demolition; after all, you can’t install insulation or drywall without windows.

Know where to find discounted materials.

Kelly had some great suggestions for finding discounts; for instance, I scored remnant countertop pieces (about half the price of a whole slab) at a stone yard. I scoured Overstock and other tile purveyors for remnants as well (in this case, the last few square feet of a batch) and lucked out with a Cle Tile moving sale that got us a 30 percent markdown on the end of a lot. And I worked Etsy for designer-imitation light fixtures, chairs, pulls and other odds and ends, unearthing unique pieces for about 60 percent of what we would have paid at a retailer like Room & Board.


DIY Money-Saving Kitchen Remodeling Tips

Remove all cabinet doors and drawers to make them easier to install and to avoid damaging them during installation.

– You’ll need a pencil, tape measure and level to mark the exact position of the cabinets on the walls.

– It is easier to install the upper cabinets first, starting in the corner(s).

– To install upper cabinets, determine their location in relation to the base cabinets. Add the height of the base cabinet to the thickness of your countertop (base cabinets are usually 34-1/2 tall and countertops are usually 1-1/2 inches thick.) Then add 18 inches for the space in between the upper and lower cabinets. Your total should be about 54 inches. This is where the bottom of the upper cabinet will sit.

If the floor isn’t level, find the highest point along the wall where the cabinets will be installed. Mark a chalk line across the wall then attach a 2×4 ledger into the wall studs to help support the cabinets while installing.

– Cut holes for the water lines on the back of the cabinet.

If cutouts are needed for electrical boxes, trace the box with lipstick then hold the cabinet in the correct place and press firmly. The lipstick will transfer to the cabinet. Connect the lines, drill a pilot hole and make the cut-out with a jig saw.

– Make sure you fasten the cabinets to wall studs. If a cabinet hits only one stud, use a toggle bolt to help keep it secure.

– When hanging cabinets, check frequently for plumb and levelness. Don’t fully tighten the screws until the cabinets are plumb, flush and level. Use shims to help achieve evenness.

– Use clamps to hold together cabinets while securing to wall.


Tips To Learn To Become A Camera Operator Profesional

Random Tips from a Professional Camera Operator

LEARN THE GEARED HEAD

I really enjoy working with geared heads, although I rarely get to use them anymore. Most of my projects can’t afford to rent one for me. Hopefully this will change with the advent of the Gearnex geared head, which I’ve now used on several shoots.

The geared head offers an incredible amount of control over camera moves, especially dolly moves. For some reason it’s very easy to match pan and tilt speeds to a dolly move by spinning wheels rather than moving a pan handle around. The wheels also offer a wide range of possibilities from very subtle adjustments to aggressive camera moves that stop on a dime.

WHEN IN DOUBT, KEEP MOVING

There are times when responsiveness is the key to getting a shot, usually in a situation where you’re shooting either very emotional or action-packed material. Keeping your hands moving a little bit on the wheels, in the case of a geared head, or keeping your hand in motion on the pan handle, in the case of a fluid head, can speed up your responsiveness. I learned this trick originally from a sound mixer, who always wiggled his hands on the mixer knobs during takes. I asked him why, and he told me that it is much easier to move your hands quickly in response to a loud noise if they are already moving. If your hands are standing still it can take longer to react. He never wiggled his hands on the knobs enough to affect sound levels, but if he had to turn them quickly his hands were already in motion.

FEEDBACK

I find that I operate a fluid head better when one hand operates the head and the other is placed around the base of the head, where I can sense panning movement, or on the tripod or dolly. Having that point of reference, either in feeling the head rotate or having a solid surface against which I can judge movement, aids me considerably, particularly on dolly moves where one can become “lost in the move” and not quite know visually what affect your movements are having on the camera because everything is moving.

WEIGHT DISTRIBUTION

One key advantage of a geared head is that it divorces your mass from the camera’s movement. In the event of the dolly coming to a sudden stop, your body may want to continue down the track. As long as the gear head wheels don’t turn, though, the camera won’t follow your body. This can be more difficult with a fluid head, but it’s definitely possible if you can distribute and brace your weight through three points of contact with the dolly. If you’re sitting, plant your feet firmly, or find a comfortable sitting position, and then put your upper body weight onto your left hand, which should be placed somewhere near the camera (around the base of the fluid head, or the boom arm itself). The idea is that your weight is firmly planted between your legs and that hand resting on the dolly, leaving your panning hand free to operate the camera.

COMPOSITIONS DON’T HAVE TO BE BALANCED

In a 1980’s movie entitled “The Hit,” two characters have a conversation at the base of a lighthouse. The camera is on the ground looking up and the bulk of the lighthouse dominates the dead center of the frame. One character is leaning against a car in the foreground on frame left, and the right side of the frame is empty.


How To Be a Better Camera Operator

Cameras

As there are so many different cameras out there I’m not going to discuss the ‘right’ camera to choose or use, as this largely depends on the type of work you do and anyway, as I’m sure you’ve already discovered there’s so much stuff online now about all the various cameras that are available, their pros and cons, special features and …well the internet groans under the strain of it all!

In fact every time I Google ‘DSLR‘ I’m sure I can hear my laptop give out a little whimper. Bless it!

Camera Care

Looking after your camera is number one. It’s simple…Look after your equipment and your equipment will look after you.

Remember film and video equipment is highly sensitive and precision built so don’t throw it around like it’s an old saucepan! Treat it with care and respect.

If you hire camera kit, treat it as if it’s your own, don’t mistreat it because it’s ‘just hired’ – that’s just totally unprofessional. Remember, if you don’t look after hire gear then the hire company you get it from probably won’t hire it out to you again. Simples. Respect all equipment at all times!

The Tripod – Your three legged friend…

The poor old tripod gets a pretty bad rap, nobody really seems to rave about it. It doesn’t have any fancy buttons to press and you can’t look through it and marvel at the amazing shot you’ve just framed. No, it just stands around lonely and dejected and you tolerate carrying it around on your shoulder because you’re obliged to (feel bad yet?…).

But the truth is, a good tripod is like a good friend… and as we all know you can always rely on a good friend. My trusty Ronford F4 weighs a ton and has legs as stiff as a geriatric with chronic arthritis, but we’ve been together over 30 years and I wouldn’t change it for the world. Despite its little foibles, it’s rock steady and its pans and tilts are as smooth as the day it was made… it has never let me down.


A GUIDE TO BECOMING A CAMERA OPERATOR

Director of Photography Etienne Sauret’s Viewpoint

Experienced camera operators possess unique combinations of skills. They all seem to have artistic sensibilities – facile perception, a keen eye and the ability to compose balance and beauty in a frame; they also have impressive technical skills – a solid understanding of lighting, audio equipment, electrical requirements and even the physics required to produce the right shot with efficient timing. Due to the rigorous demands of the job, and the un-repetitious nature of the work, most camera operators build a career with a blend of education and on-the-job training. They also tend to be confident, lifelong learners willing to take on new challenges and learn new technologies to develop their craft.

The Camera Operator Job

A camera operator is someone who sets up a camera and records images that will later be edited for an audience. Camera operators are employed to film TV shows, motion pictures, music videos, documentaries, news segments, corporate meetings and sports events. In the US, most operators work in the motion picture industry or in television broadcasting, but the number of operators working in corporate video production is increasing. Some camera operators are employed by production houses, corporations and institutions such as churches with in-house studios; and others work as freelancers or owner operators. The median annual Camera Operator salary in the US is $38,938, as of November 07, 2016, with a range usually between $31,958-$47,334, however this can vary based on geography and industry. For example, the mean income for the motion picture industry is $64,810 and the mean income for Broadcast and Radio is $51,970.

Assess Your Physical, Technical and People Skills

Your path to becoming an operator starts with taking a self-assessment. Since a camera operator does indeed operate camera equipment and its related accessories (which can add up to over 100 lbs with the most sophisticated camera packages), there is a level of comfort with the physical and technical nature of the work that you must be able and willing to develop. Learning about the highly technical specifications and capabilities of cameras, audio equipment and lighting is the foundation of becoming an operator. If you are fascinated with gadgets and new technology and you can’t keep yourself from experimenting with your camera settings and the video editing software on your computer, you might have what it takes for the multi-year process to learn the craft.


Camera Operating Tips & Thoughts

Last week was a perennial event called “Bridgefest” hosted by a regional radio station the church I attend operates. They typically have Christian artists and presenters in a historic 125 year old auditorium seating 6,250, located in Ocean Grove, New Jersey. This year Pastor Pancho Juarez spoke, Matt Schuler and Big Daddy Weave shared the stage with … well … me.

You see, I volunteered to run camera and that turned into me operating handheld, so at times I was on-stage with the bands.

While operating a camera is fresh in my mind I thought I would share some reflections on camera operating in general and operating handheld in particular. Admittedly, these perspectives are from that of a video director, not solely a camera operator.

If you have camera-operating advice you would like to share feel free to do so in the comments section below!

THE KIT

We had a total of four cameras (Sony HDC-1500 SMPTE fiber tethered CCU/RCP HD camera chains) with a portable video carrypack.

One camera, (the tight follow “money shot”) was situated halfway back in the house, orchestra level with a Fujinon HA42x9.7 (9.7mm – 407mm) stabilized lens. The next camera was “a slash” angle from house-left. This camera like the previously mentioned was in studio configuration (meaning it had a big rear viewfinder, rear zoom and rear focus lens controls), but this one had a Fujinon HA18x7.6 (non-stabilized) lens as opposed to the 42x earlier. The third camera worked a few locations including house-right slash and also had the ability to work the pit and on-stage stage-left as a handheld with a Fujinon HA18x7.6 non-stabilized lens. Since it needed to work both on a tripod (when in the slash location) and handheld (pit and on-stage) it did not have a studio viewfinder, making it easier and quicker to dismount from a tripod and move around. Lastly, my camera had a Fujinon ZA12x4.5 wide angle lens working the downstage center lip, pit and as well as on-stage, stage-right.

STUDIO CONFIG CAMERAS

As mentioned, the two studio configuration cameras had large viewfinders and rear lens controls. These cameras offered a lens height of about 6.5 feet above the surface that the camera operators were standing. If we had mounted the studio viewfinders on top of the cameras (where they would normally go) that would have meant the viewfinders would be > 7 ft high causing the camera operators fatigue (potentially requiring chiropractic care due to stiff necks) over hours of program content. Instead of mounting the viewfinders to the top of the cameras we had a DIY bar of aluminum which with a wedge mount attached on one end and on the other end were holes to bolt the bar to the camera’s quick release plate. This allowed the bottom of the studio viewfinder to be at the bottom of the camera, side-mounted at eye level for the operator.


TV or film camera operator

What does a TV or film camera operator do?

Camera operators record moving images for film, television, commercials, music videos or corporate productions. They operate film or digital video cameras, usually under instruction from the director or director of photography. On a typical job, you’ll:

set up and position camera equipment

choose the most suitable lenses and camera angles

plan and rehearse shots

follow a camera script and take cues from the director, or floor manager if in a TV studio

solve any practical or technical problems

work closely with other technical departments, such as lighting and sound

You may be the only camera operator and use a portable single camera, or you could be part of a TV studio camera team. On feature films and TV drama productions, you’ll be part of a larger crew with a specific role. This might be:

second assistant camera (clapper loader) – loading and unloading film, counting the takes and helping the camera crew

first assistant camera (focus puller) – judging and adjusting the focus on each shot

grip – building and operating cranes and pulleys needed to move a camera during shooting

You’ll normally specialise in either film or television work, as the equipment and techniques can differ. However, with the growth in digital cameras and HD technology, it’s becoming easier for camera professionals to work across all formats.

What do I need to do to become a TV or film camera operator?

Employers will be more interested in your technical skills and practical experience than academic qualifications. In practice, many camera operators take a college or uni course to develop their camera skills before looking for work.

It may give you an advantage if you can find a course that offers practical experience and possibly a work placement. You can also get practical experience and build up your contacts through:

community film projects

working for a camera equipment hire company

finding work experience as a runner or camera assistant with a production company

The Best Way To Do Clogged Toilet

How to Unclog a Toilet

Clogged toilet? No problem. With a little practice and a plunger or a toilet snake, even a home repair rookie can get most clogged toilets back up and running in minutes, without flooding the bathroom and making the situation worse. In this article we’ll show you how to avert a morning household disaster by clearing a clogged toilet fast.

Toilet not flushing all the way? Test for a clog when your toilet won’t flush

Ever uttered the words my toilet won’t flush? A poor flush means that your toilet drain is either partially or completely plugged. If your toilet won’t flush – a no-drainer – is obvious. The toilet bowl will fill to the brim with flush water and perhaps overflow. Give the water level 10 minutes or so to drop, then attack the problem with a toilet plunger to begin unclogging a toilet.

However, most clogged toilets are slow drainers. That is, flush water partially fills the bowl but doesn’t rush out and clean away the waste. The water level remains high, then usually drains down to normal height within a minute or two. You might not know the toilet is clogged until you flush it. So if you suspect a problem, test the drainage first. If it doesn’t drain, don’t flush it. Reach for the toilet plunger.

How to fix a toilet that won’t flush:

Remove the tank lid and lift the flapper valve slightly to let a cup or two of water into the bowl to see if the water goes down before trying to unclog the toilet. Flushing a clogged toilet may flood your floor!

Lift the Flapper to release a bit of water

Lift the flapper slightly to release a little water. That’s how to make a toilet flush. However, if there is a clog, the water won’t flush.

Unclog a Toilet: Begin with a plunger

For about 90 percent of clogged toilets, you only need one special tool—a toilet plunger. Buy a toilet plunger with an extension flange on the rubber bell-shaped end. A toilet plunger with an extension flange is designed to fit toilets better, so you can deliver more “oomph” to the plunge. You could pull a woodchuck from a hole with a toilet plunger with an extension flange. The toilet plunger will unplug sink and tub drains, too, if you simply fold the flange back into the bell.

Here’s how to use a plunger:

The first step in how to unclog a toilet with a plunger is to plunge the toilet with the rubber flange pulled out to get a better seal. Push in and out vigorously, keeping enough water in the bowl to cover the plunger. Keep towels handy to wipe up water that splashes out. If this doesn’t fix the issue, keep reading on how to plunge a toilet.

Plunging Tips: How to Use a Plunger

A toilet plunger fits over and seals the toilet drain. Wear rubber glove—things can get messy—and follow these plunging tips:

  • Make your first plunge a gentle one. Initially the bell is full of air. A hard thrust will force the air back around the seal and blow water all over the bathroom and you!
  • Once you force out the air, plunge vigorously in and out, maintaining the seal. You’ll be forcing water both directions in the drain, which will effectively loosen most clogs. Stick with it, plunging 15 to 20 times if necessary.
  • Be patient. Try alternating between steady strokes and occasional monster heaves.
  • Keep enough water in the bowl so the toilet plunger stays covered. Trying to force air through the toilet trap won’t generate much pressure.

Most of the time, this is all it takes to clear the clog. But for tougher clogs, try using a toilet snake. (Note: If you have repeated clogging, it might be a toilet performance issue.


No Plunger Needed: 7 Easier Ways to Clear a Clog

It’s never an ideal situation: A quick trip to the bathroom followed by a single flush and, boom, you’re dealing with a clogged drain or—much worse—a nearly overflowing toilet. If you find yourself without a plunger, or if it fails you, consider your options before hiring a plumber. There are a plethora of alternative ways to take care of business, many of which require nothing more than the items you have in your bathroom or kitchen cabinets. Here are 7 method…

  • Heat Wave

When you notice a nasty clog, your best bet is to fill a pan with hot water. Heat it up on the stove or use the tap, but don’t let the water get to boiling point. Pour it down the drain and let it sit for a few minutes to see if it loosens the clog. You’ll know if your efforts were successful if you see the water start to drain. Then, give the toilet a flush or two. In many cases, the hot water is enough to break up whatever is causing the backup.

  • Dish Duty

If you need to kick things up a notch, borrow some dish soap from the kitchen and squeeze a generous amount, about a 1/4 cup should do, into the toilet bowl. Let the soap sit for 5-10 minutes so it has time to move down the drain and reach the clog. Then, add hot water (again, not boiling) to the bowl and give it some time to sit. In most cases, the soap will act as a lubricant and grease the clog in the toilet drain to get everything moving again.

  • Fizzy Fix

It’s time to channel what you learned in elementary school science! If your toilet bowl is already filled to the brim, either empty out some of the water or be prepared for a little overflow. Next, pour one cup of baking soda and one cup of vinegar down the toilet drain. When the vinegar and baking soda combine, the natural chemical reaction will bubble up and loosen the clog. After about thirty minutes, follow up with some hot water and see if it drains. If it does, you’re good to go. If it doesn’t, repeat the process once more.

  • Brush Battle

This may seem a little unpleasant, but if you’re really in a bind and there’s no plunger in sight, grab a toilet brush and angle the bristles down the drain. Pumping up and down a few times should be enough to loosen things up so the clog clears in no time.

  • Helping Hanger

If you don’t have access to a plumbing snake, you can fashion your own using a wire coat hanger from your closet. Simply unwind the hanger so that it’s completely straight with the exception of the hook. Then, wrap a small rag around the hook to help prevent any scratches or damage to the porcelain and, while wearing rubber gloves, gently angle the hanger down the drain until you find the clog. When the water starts to drain, flush the toilet a few times to clear it out.

  • Bathroom Bomb

Don’t run out to buy Draino, create your own DIY de-clogger instead by mixing together the following ingredients: 2 cups baking soda, 1/4 cup Epsom salt, and 8-10 tablespoons of dish detergent (add one tablespoon at a time). Pour the combination into individual muffin liners, then let them dry and harden overnight. The next morning, drop one into the toilet bowl, add four cups of water, and let it sit for a few hours to see results.

  • Vacuum Valve

Last resort: Rent a wet/dry vacuum from your local hardware store—do not, we repeat, do not try this with a regular vacuum. First, use it to empty the water from the bowl. Next, wrap the hose in an old rag to create a seal, then stick the vacuum a few inches down the drain. When you turn on the vacuum, it should suck out the clog. Again, don’t forget the rubber gloves!


The One Surefire Way To Unclog a Toilet

These tips will get the water flowing.

Clogged the toilet? Don’t panic. A toilet clogged with human waste is disgusting and can be embarrassing, but it’s easy to fix. I’ve unclogged countless stoppages for my family and friends, and during volunteer work. What I write here isn’t theory. It works

Step 1

The lower portion of the toilet is called the stool. If the stool is filled with water and getting close to overflowing the rim, shut off the stop valve that supplies water to the toilet. The valve typically is located to your left as you stand and look at the toilet. In rare cases, when the toilet isn’t close to a corner, it may be on the right.

Step 2

Make a Toilet-Clearing Tool From a Wire Hanger

Take a coat hanger and a pair of linesman pliers (or anything that can cut wire). Cut the hook off the coat hanger. Bend the hanger into a straight rod and use the pliers to bend a small one-inch-long hook into the wire’s end. Hook into the waste and break it up. Yes, this process is gross and may make you gag, but do you want to clear the clog or not?

Don’t get too aggressive here or you’ll scuff up the stool and spend the next couple of hours polishing out the scratches with powdered cleanser.

Step 3

Hooking into the waste and breaking it up will create a water passage that will lower the water in the stool. Next, take a cup plunger such as this and place it over the drain hole in the bottom of the stool. Gently rotate the plunger’s handle like you were stirring a pot, while keeping the plunger’s cup firmly over the drain. This rotation seats the plunger’s cup and permits a powerful plunging action.

Step 4

Pump the plunger handle straight down, aiming directly into the drain opening. You should feel and even hear the suction. If not, you didn’t seat the cup over the drain hole. No problem—just repeat Step 3 and plunge again.

Step 5

The toilet will drain (I’ve never seen one not drain and I’ve cleared some whoppers). Flush the toilet somewhere between two and four times to move the waste out of the house’s drain and into the sewer or septic tank.

If Poo Wasn’t Your Problem

In rare instances, a toilet will swallow an oddly shaped solid like a toy or a piece of clothing. In these cases, you can unclog the toilet only to have the obstruction lodge downstream, especially if there’s hair or preexisting clogged material. When that happens, your best bet is to call a plumber and have him power auger the home’s drains. They probably needed it anyway.


How to Unclog a Toilet Like a Plumber

It’s every man’s worst fear. You’re at someone’s house, you  finish doing your business and flush the toilet, but instead of going down, the water comes up along with whatever you just deposited in the bowl. Would you be paralyzed with panic in that moment? Or do you know what to do?

Thankfully, unclogging a toilet isn’t hard at all. Even the most gnarliest of clogs can be taken care of with ease.

  1. Stop the Toilet Bowl From Filling Up.

If it looks like the water might overflow out of the toilet, Rod suggests taking the lid off the tank as quickly as possible and closing the toilet flapper. The flapper releases water from the tank and into the bowl. It looks like, well, a flapper. If you’re worried that your flush has a good chance of turning into a flood, take off the top before you pull the trigger. Then you can keep one hand close to the flapper while the other hands pushes the flusher. The minute it appears the water is rising, you’re ready to stop the deluge

  1. Get the Right Plunger

Once disaster has been averted, it’s time to unsheathe your plunger. To effectively use a plunger, you need a good seal between it and the toilet bowl. Funnel-cup plungers are the best plungers for this. They’re the ones with a flange, or added piece, extending off the bottom of the rubber cup.

  1. Warm Up Your Plunger

Stiff, hard plungers don’t work as well as soft and pliant ones. Run your plunger under some hot water before you use it. This will soften up the rubber, which will help you get a better seal on the toilet bowl.

  1. Plunge Correctly

Stick the plunger in the bowl and use it to form a solid seal over the exit hole. Rod said that most people only focus on the downward push when plunging. But the pullback is just as important. Give a few good up and down strokes with the plunger and flush the toilet. If the water clears from the toilet, then you’ve successfully unclogged it. If the toilet starts overflowing again, just close the flapper to stop water from entering the bowl. Repeat the plunge and flush sequence until your clog is gone.

  1. Secret Plumber Trick: Add Hot Water and Dishwasher Detergent.

Add a few cups of hot water to the toilet bowl before you start plunging. After you pour the hot water in, let it sit for a few minutes. To put it mildly, the heat helps break the, um, stuff up. This will make unclogging the toilet with the plunger much, much easier. The heat from the hot water can sometimes break up the clog without plunging, so this could be a good tactic to use if you a clog a toilet at a friends house and you don’t want to face the embarrassment of asking for a plunger. Also, try adding some dishwasher detergent to the mix. The soap can help break the clog up, as well.

  1. Another Secret Plumber Trick: Use Baking Soda and Vinegar

Another trick to unclog toilets comes from your elementary science fair project. Pour one cup of baking soda into the clogged toilet and then slowly pour one cup of vinegar into the bowl. The chemical reaction and fiz can help break down the clog.


For Harder Clogs, Use an Auger

If the plunger doesn’t work, Rod says it’s time to bust out a toilet auger. An auger is a cable-like device that you snake through the toilet hole to help loosen up a clog. You can find augers at most hardware stores.

To use an auger, you simply snake the cable down the hole. Start turning the crank on the end you’re holding until it stops. This means you’ve reached your clog. The auger will either break up the clog or hook on to it. If it feels like you’ve hooked the clog, pull it out. Discard any waste on the end of the auger. Give the toilet a few good plunges to clear up any left over blockage. Flush. Shazam! Cleared toilet. You might want to put some gloves on for this job in case you need to clean off some… matter from the plumbing snake.


4 Signs Your Main Sewer Line Is Clogged

The sooner you recognize the warning signs of a main sewer line blockage, the better. A clog in the main sewer line that goes ignored or unnoticed can lead to costly repairs but can also expose your family to contaminated water.

To help keep your family and home safe, we’ve covered 4 warning signs that your home’s main sewer line is clogged.

Sign #1: Multiple backed-up drains

Check the following water fixtures:

  • Toilets
  • Sinks
  • Bathtubs
  • Showers

If more than one drain is slow moving, gurgling, smells bad or has water backing up, you most likely have a main sewer clog

You see, your home’s drain lines carry wastewater away from your home and are designed like a tree—the “trunk” is the main sewer line while the “branches” are smaller, secondary drain lines that connect to each water fixture (all secondary lines feed into your main sewer line).

And because every water fixture’s drain eventually connects to the main sewer line, a blockage in that main line will affect various drains in your home.

Sign #2: Drainage in sewer clean out

If you see sewage standing in (or draining out of) your home’s sewer cleanout, you have a main sewer clog.

So what exactly is a “sewer cleanout” and how can you find yours?

Well, a “sewer cleanout” is a pipe that connects directly to your home’s main sewer line and gives plumbers direct access to clear any blockages. In most Colorado homes, the sewer cleanout is usually located just outside your home or in the basement and is marked by a round or rectangular cap (sometimes titled “sewage” or “cleanout”).

Sign #3: Sewage in floor drain

If your main sewer line is clogged, all the sewage and waste water sitting in the pipes have nowhere to escape. Which means, eventually, the sewage will force its way into a secondary drain.

And when this happens, you’ll soon be able to see (and smell) sewage coming up from floor drains.

Sign #4: Water backs up in shower when toilet flushes

If you notice that water backs up in random places as you’re using water fixtures, you likely have a blockage in the main sewer line

Two common examples of this include:

  • When you flush your toilet, water backs up into the bathtub/shower.
  • When you run your washing machine, sinks or toilets start to overflow.

You see, a clog in the main sewer line means all the wastewater that is trying to leave your home now has nowhere to go and is eventually forced back up other drain lines.

Make A Good Electrical Panel Upgrades

Should I Upgrade My Electrical Panel? 10 Reasons to do it.

Should I upgrade my electrical panel? The electrical panel remains one of the most essential components of the house. The electrical panel brings comfort and convenience to the residents in the form of electricity. This device is responsible for providing power throughout the entire house. After some time, the electrical panel becomes old or outdated. At this point, you are faced with the question: should I upgrade my electrical panel? There are various kinds of electrical panel upgrade. You can upgrade electrical panel to 200 amps. You can also replace fuse box with breaker panel. Continue reading to discover more about electrical panel replacement and upgrade.

Why Should I Upgrade My Electrical Panel?

Various reasons why you may need electrical panel upgrade include:

  1. Your Home is Old

Old residential apartments offer cozy and retro atmosphere. This is not present in a modern home. However, these older apartments with obsolete electrical panels may not be able to support your modern electrical needs. If your old home has a 60-amp electrical panel, you may need to upgrade electrical panel to 200 amps. This way, you can use modern electrical equipment you need.

  1. Introduce New Appliances

Furthermore, outdated electrical panels may not be able to handle the workload required to power an entire home of new major appliances. This includes your refrigerator, air conditioning unit, hot tub, dryers, water heaters, and washing machine. The majority of these electrical appliances require a 240V circuit. If you want to introduce new appliances, electrical panel replacement or upgrade will be a good idea.

  1. Replace Fuse Box with Breaker Panel

What’s more, fuses have become outdated. Circuit breakers are now more efficient. They do not trip off due to overload. An electrical panel replacement offers you an excellent opportunity to replace fuse box with breaker panel. In case you are wondering why should I upgrade my electrical panel? Then, you may need to do so to replace your fuse-based electrical system with circuit breaker.

  1. Prevent Potential Electrical Fires

Over time, over-crowded connections can turn to loose connections. Thus, causing a wiring fault which can potentially lead to electrical fires. Electrical panel upgrade can help prevent possible electrical fires.

  1. Ensure Steady Flow of Electricity

Additionally, a new electrical panel will help ensure the steady flow of electricity. With this, you don’t have to worry about issues of burnt out appliances and flickering lights. If you are still wondering why should I upgrade my electrical panel? This may be a good reason to.

  1. Add More Appliances

From time to time, you may need to add more electrical appliances to your home. If you replace fuse box with breaker panel, you can easily add even more appliances to your home. Also, you don’t have to worry about blowing any fuse, tripping your breaker, or damaging your current appliances.

  1. Expect Fewer Power Surges When You Upgrade Electrical Panel to 200 amps

Furthermore, electrical panel replacement or upgrade also prevents recurring power surges. If you upgrade electrical panel to 200 amps, you can anticipate fewer power surges. Thus, adding more years on your current devices.

  1. Reduce Homeowner Insurance

In addition, electrical panel upgrade can help in reducing your homeowner’s insurance bill. When you replace fuse box with breaker panel, your home becomes safer. Hence, you will qualify for a discount on your annual bill. You will also benefit from rebates and discounts from the local electrical company. In case you are wondering why should I upgrade my electrical panel? Then, a reduction in your homeowner’s insurance is a great reason to.

  1. Save Cost

Moreover, scheduling an electrical panel upgrade will help save cost. A new panel runs more efficiently. Hence, when you update your electric panel, you can save you money on your electric bill every month.

  1. Increase Your Home Value

Lastly, electrical panel upgrade can help increase the value of your home. These new breaker panel and switchboards are aesthetically pleasing. It will increase the value of your home. It will also give you the peace of mind that the electrical panel is not the hazard it once was.


Electrical Panel Upgrade Definition:

Electrical panels divide incoming electrical power from the grid into subsidiary circuits to distribute power throughout the building. With a 25-40 year lifespan and an ever-growing reliability on electricity, these panels need upgrading and replacement.

Breaking Down an Electrical Panel Upgrade:

When to Consider Upgrading Your Electrical Panel? There are two scenarios when you should consider upgrading your current electrical panel.

The first is if you are experiencing electrical problems in your home. If you notice flickering lights or you have to turn off one appliance to use another, then the circuit breakers on the electrical panel could be overloaded. This will lead to your breakers tripping often or eventually failing to trip and overheating. This can cause irreversible electrical damage from wires melting and potentially catching fire on the side of your home.

The second scenario when you should consider upgrading your electrical panel is if you are looking to expand your electricity demand in your home. Some examples of this include getting a hot tub, installing an HVAC system, or installing a solar system on your roof. During these home improvement projects is a good time to visit upgrading your electrical panel both from an efficiency and safety perspective.


Give Your Home An Electrifying Upgrade

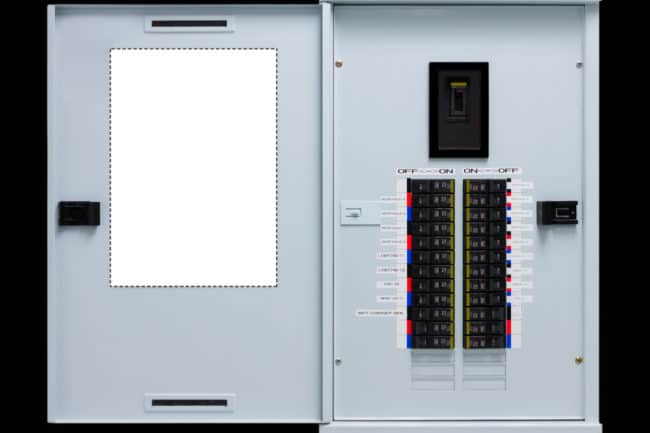
What’s the capacity of your service panel?

Electrical panels are one of those things that just work until they don’t. Most homeowners know how to reset a circuit breaker that trips, but few people besides electricians give the industrial grey box in the garage or laundry room much thought until the lights go out.

Next time you’re near your service panel, take a look inside. There will be one large breaker separate from the others. It should be marked as 80 Amp or higher. This is the maximum capacity of your entire home’s electrical system, in amps.

Why do amps even matter?

Amps are a measure of how much electricity can flow through a circuit. Your home is divided into multiple circuits, which all meet at the service panel.

Both the individual circuits and the master service panel have a limit to how much electricity can flow through them before they overheat.

Circuit breakers in the main panel cut power to individual circuits if they start to draw more current than is safe.

But most older breaker panels can’t handle anywhere close to the sum of all your home circuits. So on an older breaker panel, when you plug in a hair dryer, a coffee pot, then somebody goes to make toast, it’s lights out. Too much power has been drawn from the whole system, even if no single circuit was overloaded. The culprit is a low capacity service panel.

Advantages of a 200 Amp Service Panel

Safety

An upgraded service panel can let your home electrical system use more power safely. Even if you aren’t tripping the breakers right now, a 100 amp panel in a modern home is running far too close to capacity to be safe for long term use.

As a rule, no electrical circuit should sustain loads of more than 80% the maximum capacity. The extra amperage capacity is a safety buffer electrical engineers build into home circuits so that a sudden power spike doesn’t dangerously overload wires and outlets.

This means that in a 100 amp system, you shouldn’t draw more than 80 amps. Out of this capacity, 15 to 20 amps will be used for home lighting. Another 20 amps will be used for an air conditioner or heater.

Before you’ve even turned a radio on, that’s halfway to your home’s safe capacity. Add a few computers , smartphone chargers, a television, and youre evening power draw will be easily over the safe limits of the system.

What happens then? A best case scenario is a breaker trips when the system hits the absolute limits of the system’s safe working capacity. In an older system, it’s also possible that an electrical fire could be sparked by an overloaded outlet or light fixture.

More Circuits

Even if your current system has a total capacity to meet your home’s needs, the individual circuits are often limited. Smaller service panels have less room for circuits, and those circuits are usually rated for lower amp draw than larger panels.

This can come in handy in a couple of ways.

By dividing your house into more circuits with less things attached, you can run more gadgets on the same electrical capacity.

This can really come in handy if you ever use power tools. Having your workshop split across two circuits can let you run larger tools, and if you ever work on projects with a friend or your kids, it can let you run multiple shop tools at once without overloading any circuits.

Room to Grow

If you’re considering any major home upgrades like a backyard pool  or a basement bar, upgrading to a 200 amp service panel will give your power to spare. It’s also a good starting point if you’re planning to upgrade your office or home theater, which can be major power sinks even with modern equipment.

Upgrade your service, not just your panel!

After your service panel is upgraded, there’s a step you can take to get even higher performance from your home electric system.

Just by upgrading to a 200 amp panel, you’ll be able to take full advantage of your 100 amp service without losing 20% to safety limits.

If you want even more power, most homes can be switched to higher amp service. This can give you a safe working capacity of 160 amps in your home, with a 40 amp reserve for high-draw situations like Christmas lights or an electric snowblower.

How much power do you need?

200 Amps is the minimum recommended service panel size in full size modern homes. Some situations will require significantly more. Larger homes or homes with a machine shop or car lift in the garage can require as many as 400 amps. It’s best to ask your electrician for advice on this, but this formula can give you a ballpark idea of what you need:

  • Multiply your living space in square feet by 3. This is your lighting and electrical outlet needs (in watts)
  • Add 1500 watts to that for each circuit that mainly runs appliances, like in laundry rooms and kitchens.
  • Add the real wattage of any dedicated circuits, like air condtioners and pool pumps.
  • Set aside the first 10,000 watts. Find 40% of what’s reamining, and add that to 10,000. This is how many watts your home will draw.
  • Divide your calculated watts by 230. The quotient is how many amps your service panel must provide to safely meet your energy needs.
  • Now, remember what we said about 80% being the maximum safe capacity. If you calculate a number higher than your current service panel, an upgrade is in order. But if that number is greater than 80% of your current panel’s maximum capacity, an upgrade will stbill be needed for safety purposes.


Understanding Your Home’s Electrical Load

You don’t need to be an electrician to know the capacity of your home’s electrical load. Brush up on some basic knowledge about fuse boxes and service panels that will help you use energy safely and efficiently.

A basic understanding of your home’s electrical load is important knowledge for homeowners. After all, there will certainly come a time in your home’s life when you’ll need to shut off or restore power. We’ll walk you through four key tools for working with electrical loads: how to evaluate your home’s load, how to add capacity, how to understand the size of your load, and how to inspect a service panel.

Evaluate Your Home’s Power Load

Different homes need different amp services. A 60-amp service is probably inadequate for a modern home. A 100-amp service is good for a home of less than 3,000 square feet that does not have central air-conditioning or electric heat. A home larger than 2,000 square feet that has central air-conditioning or electric heat probably needs a 200-amp service. Use the equation listed above to deduce exactly how many amps your home needs.

Add Capacity to Your Load

Installing a new circuit is not difficult, but before you begin, make sure your service panel can handle the extra load. A service panel with too many circuits is dangerous.

Fuse boxes rarely have space for new circuits. If you have a fuse box and need new service, replace the fuse box with a new service panel or install a subpanel.

If you see an available slot in a breaker box, either an open space or a knockout that can be removed, chances are you can simply install a new breaker there and run cable to it. If there is no open space, local codes may allow you to replace a single breaker with a tandem breaker, which supplies power to two circuits.

Make sure you do not overload your service panel. A panel’s total amperage is printed near or on the main circuit breaker, which controls all the circuits in the panel. Most breaker boxes are 100, 150, or 200 amps. Add the amperages of all the individual breakers in the box. The total may be more than twice the total amperage of the box. For example a 100-amp service panel may have circuit breakers that add up to more than 200 amps. This is normal.

Take your total amperages and the name of the service panel manufacturer with you to meet with the inspector to ask about adding another circuit. Or compute your home’s power needs.

Know the Right Size:

  • Small Fuse Box

It’s also important to know the size of your electrical load box. A small, 60-amp fuse box may be found in an older home that has not had its wiring upgraded. It can supply power to only one 240-volt appliance and is probably inadequate for a home of 1,200 square feet or more.

  • Medium-Size Service Panel

A 100-amp service panel provides enough power for a medium-size home, even if it has several 240-volt appliances and central air-conditioning.

  • Large-Capacity Service Panel

Many newer homes and some older large homes have a 150- or 200-amp service panel.

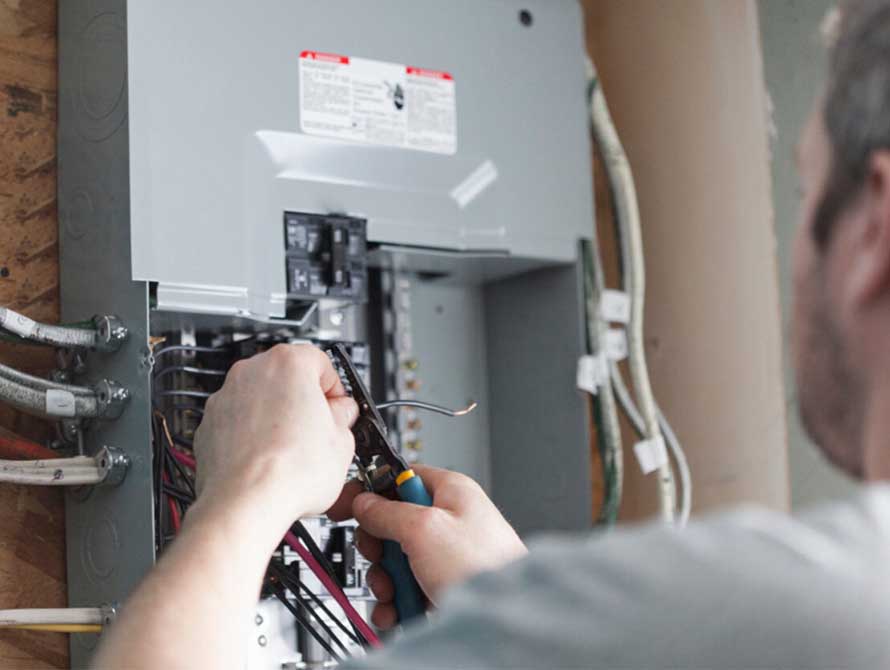
How to Inspect a Service Panel

A service panel should be located where adults can get to it easily but children can’t. Any exposed cables leading to it should be firmly attached to the wall and clamped tightly to knockout holes in the panel. If there are any open holes, cover them with a knockout plug (available at hardware stores).

If a 14-gauge wire is connected to a 20-amp circuit breaker or fuse, replace the breaker or fuse with one that is 15 amps to prevent the wire from overheating. In most cases, a 20-amp fuse or breaker should connect to a 12-gauge wire; a 30-amp fuse or breaker should connect to a 10-gauge wire.

Wires should run in a fairly orderly way around the perimeter of the panel. If you find a hopeless tangle, call in an electrician for an evaluation. Also call in a pro if you find melted or nicked wire insulation, any signs of fire, or extensive rust.

In an older home there’s a good chance that new wiring has been added to a service panel. It may have been done by a pro, but it could be amateur work too, so check all the connections.


Understanding Electrical Capacity

Calculating how much power your home needs is a matter of calculating the amperage load of all the various appliances and fixtures, then building in a margin of safety. Generally, it’s recommended that the load never exceeds 80 percent of the electrical service’s capacity.

To use the math, you need to understand the relationship between watts, volts, and amps. These three common electrical terms have a mathematical relationship that can be expressed in a couple of different ways:

Volts x Amps = Watts

Amps = Watts/ volts

These formulas can be used to calculate the capacity and loads of individual circuits, as well as for the entire electrical service. For example, a 20-amp, 120-volt branch circuit has a total capacity of 2,400 watts (20 amps x 120 volts). Since the standard recommendation is for the load to total no more than 80 percent of the capacity, this means that the 20-amp circuit has a realistic capacity of 1920 watts. So to avoid the danger of overloads, all the light fixtures and plug-in appliances together on this circuit should consume no more than 1,920 watts of power.

It is fairly easy to read the wattage ratings of all the lightbulbs, television sets, and other appliances on the circuit to determine if a circuit is likely to overload. For example, if you routinely plug a 1500-watt space heater into a circuit, and run several light fixtures or lamps with 100-watt bulbs on the same circuit, you have already used up most of the safe 1920-watt capacity.

The same formula can be used to determine the capacity of the house’s overall electrical service. Because a home’s main service is 240 volts, the math looks like this:

240 volts x 100 amps = 24,000 watts

80 percent of 24,000 watts = 19,200 watts

In other words, a 100-amp electrical service should be expected to provide no more than 19,200 watts of power load at any given time.

Choosing The Ideal Possums Pest Control

Opossum Identification

The only marsupial native to North America, opossums are roughly the size of a house cat. They are grey and white in color, have narrow, tapered heads and pointed, pink noses.  Both their front and hind feet of include five curled toes, and the inner toe on the hind foot is opposable, much like a thumb, allowing the animal to grab small branches.  Opossums range in size from 24 and 33 inches long and typically weigh between 6 and 15 pounds.

Opossums are nocturnal, meaning they venture out of their dens in the evening in search of food. They are very secretive, slow, and solitary.  Opossums are excellent climbers and will climb trees or hide in bushes when chased. When unable to reach safety, an opossum will lie down, close its eyes,  let its tongue hang out of its mouth, and excrete a very bad smelling substance. This behavior has become known as “playing possum” and is caused by nervousness, but the opossum usually recovers quickly and will seize the opportunity to make a clean getaway.


Habits

Opossums are slow, secretive and solitary. They venture from their dens at night to look for food, traveling distances of 1/2 to 2 miles depending on food availability and the time of year. They’re observed frequently in the glare of automobile headlights as they eat other animals killed by traffic (and often suffer the same fate).

Opossums tend to wander a great deal and shift their home sites frequently, but most spend their lives in an area 10 to 50 acres in size. Opossums do not hibernate, but stay denned up during extremely cold weather. Opossums are well adapted for climbing. The opposable toe on the hind foot acts like a thumb, allowing them to grasp small branches. An opossum can hang by its tail for a short time if at least half of the tail encircles a thick branch.

Opossums often climb trees or hide in brush heaps when chased. They are well known for “playing ‘possum”. When frightened and unable to escape, an opossum rolls over on its side, becomes limp, closes its eyes and lets its tongue hang out of its mouth. The heartbeat slows down and the animal looks dead, causing many would-be predators to lose interest. This reaction is caused by a nervous shock, but the opossum recovers quickly and takes the first opportunity to escape.


Remove Attractants

Opossums are scavengers that enter your yard in search of food and shelter. They’re very resourceful, so they will eat any kind of plant or animal matter available. They will also find shelter in any covered, dry area – from brush piles to attics. Remove these attractants to keep opossums out.

  • Clean up fallen berries, fruits and birdseed.
  • Avoid feeding your pets outside. If you must do so, remove all leftover food before dusk.
  • Scrub grills and barbecues after every use.
  • Secure garbage and compost in animal-proof containers with tight-fitting lids.
  • Remove woodpiles and logs in which opossums can find shelter.


Opossum Control and Trapping in Illinois

When opossums are seen in the yard, there is no reason to control them unless their den is in a troublesome area on the property. If opossums are already living beneath a deck or stoop, trapping them humanely may be necessary, especially if the family dog is likely to attack them.

A barricade-style trap can be set in conjunction with performing a Deck or Stoop Screen Up. This ensures that once the animals are trapped, the problem will never reoccur. It also ensures that only the animals beneath the stoop or deck are trapped, since putting a trap out in the open can result in non-target captures.

Sometimes opossums die under stoops and decks. Whether they are ill from infection, injured in fights with dogs or hit by cars, an injured opossum will often travel home to die in its own burrow. Removing a dead animal from under a stoop or deck can be a time-consuming and sometimes costly process that can take the better part of a day to perform. Screening Up decks and stoops in advance prevents this undesirable event from occurring.

Opossum Removal

We are a professional opossum removal and pest control business based out of south IL. Possums tend to cause the following problems:

  • Possum stealing pet food
  • Possum appears threatening
  • Mother possum living in attic
  • Possum living under porch or shed
  • Dead possum on property
  • We can solve any problem/conflict with opossums.

The opossum is an unusual animal. It is North America’s only marsupial. The babies are born extremely tiny, and then they enter the pouch and attach to a nipple. The opossum has 13 nipples. As they grow, they crowd each other out, until only 4-5 are left at the end, and then they leave and start lives of their own. Opossums have 50 teeth, tiny brains, bifurcated peni, opposable thumbs, and prehensile tails.